Audi Q3: Release Cable, Removing and Installing
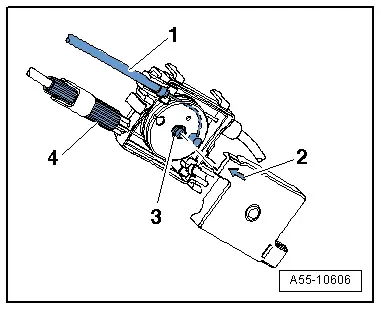
Release Cable Coupling

- Remove clips -1- and lift the release cables -8- and -9- on both sides toward the hood latches.
- To remove the coupling -2-, release the retainers -arrows- on the front of the lock carrier -3- and push them to the rear out of the bracket.
- Engage the release cable to the vehicle interior -4- into the coupling roller -5- as illustrated.
- Press the release cable into the mount on the housing.
- Install the housing cover -7- so that the arrow points toward the release cable inside the passenger compartment.
- Adjust the release cable -8- using the knurl -6- inside the passenger compartment so that the hood catches unlock evenly.
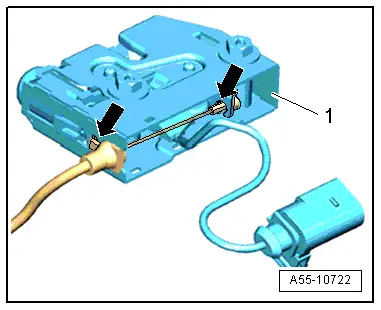
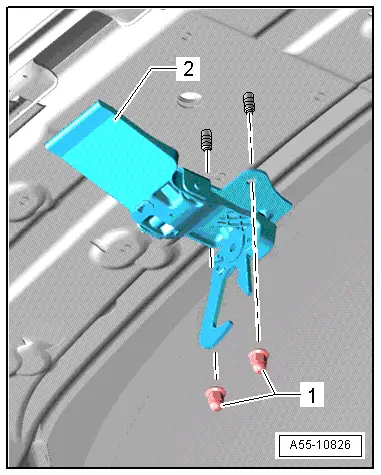
Attach the Release Cable into the Coupling
- Install the release cable -1- into the roller -3- inside the passenger compartment as illustrated.
- Press the release cable into the mount on the housing.
- Install the housing cover -2- so that the arrow points toward the release cable inside the passenger compartment -1-.
- Turn the knurled piece -4- to adjust the release cable.
Release Cable, Engaging in Hood
- Insert the release cable -2- into the operating lever -right arrow- inside the hood lock -1-.
- Install the release cable and the guide into the hood latch from underneath. Make sure the hooks -left arrow- latch into place.
Engaging the Release Cable in Release Lever
- Install the release cable -2- into the hood release lever -1- in the direction of the -arrow-.
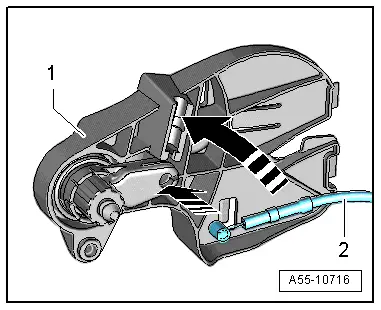
- Move the release cable -2- upward as illustrated and clip it into the bracket -1-.
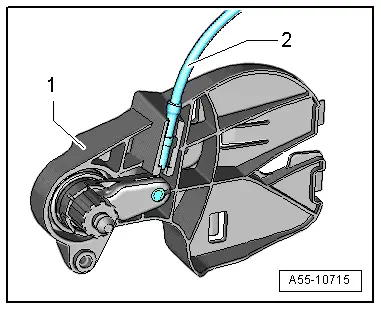
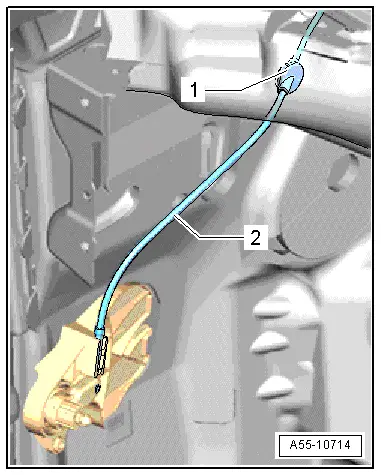
Routing the Release Cable inside the Passenger Compartment
- Route the release cable -2- along the "A-pillar" as illustrated.
- Press the grommet -1- onto the "A-pillar" from the interior.
Routing the Release Cable inside the Engine Compartment
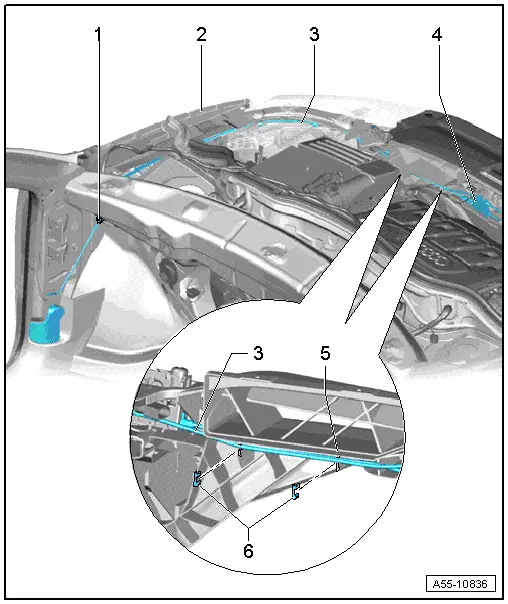
- Route the release cable -3-, starting from the passenger compartment, inside the engine compartment and along the fender flange -2- as illustrated.
- Make sure that the grommet -1- is properly pressed sideways into the A-pillar.
- Slide the coupling -4- onto the lock carrier.
- Push the release cable and clips -6- onto the tabs -5- on the lock carrier.
Catch, Removing and Installing
Center Catch, Removing and Installing
Removing
- Remove the nuts -1- and the hood catch -2-.
Installing
Install in reverse order of removal.
Catch, Removing and Installing

1 - Nut
- Tightening specification. Refer to → Chapter "Overview - Hood".
2 - Catch
- Removing
- Remove the bolts and the hood catch.
- Installing
- Align the hood catch with the markings on the hood -arrows- and then tighten the bolts.
3 - Hood
READ NEXT:
 Hinges, Removing and Installing
1 - Hood Hinge
Removing
Before removing a hood hinge, support the hood or secure it against
falling.
Remove the gas-filled strut. Refer to
→ Chapter "Gas-Filled Strut,
Overview - Rear Lid
Overview - Rear Lid
1 - Rear Lid
Removing and installing. Refer to
→ Chapter "Rear Lid, Removing and Installing".
Rear Lid Seal, Removing and Installing. Refer to
→&nbs
Rear Lid, Removing and Installing
Rear Lid, Removing and Installing
A second technician will be needed during removal and
installation to support and to hold the rear lid.
Removing:
Note
Mark the position of the re
SEE MORE:
Stabilizer Bar
Overview - Stabilizer Bar
1 - Subframe
2 - Bolt
25 Nm + 45º
Always replace if removed
Install evenly
3 - Clamp
4 - Bearing
Always replace the rubber mounts on both sides of vehicle
5 - Stabilizer Bar
Removing and installin
Turn signal and high beam lever
Fig. 38 Operating lever: switching the light functions on
and off
The lever operates the turn signals, the high
beams and the headlight flasher.
Turn signals
The turn signal will activate when you move the
lever into a turn signal position while the ignition
is switched on. The respective or
ind
