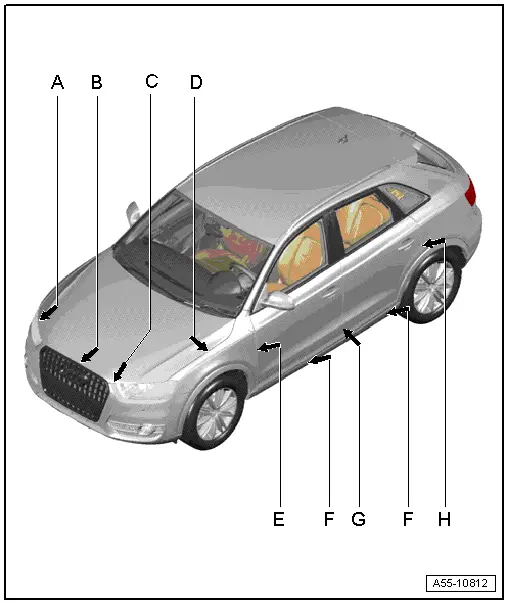
Audi Q3: Hood, Adjusting
Special tools and workshop equipment required
- Gauge - Gap Adjustment -3371-
Gap Dimensions for Hood
 Note
Note
All dimensions are in mm with a +- 0.5 mm tolerance.
- Dimension -A- = 4.5 mm
- Dimension -B- = 4.5 mm
- Dimension -C- = 4.5 mm
- Dimension -D- = 3.0 mm centered
Height Adjustment Stop Buffer
1 - Adjusting Buffer
 Note
Note
The adjusting buffers are used to adjust the height of the lid.
- The adjusting buffer must lightly contact the lock carrier when the hood is closed.
2 - Hood
Hood Impact Guard, Replacing
 Note
Note
The impact guard is also equipped with double-sided adhesive tape.
1 - Clip
2 - Impact Guard
- To remove, remove the clip from the hood and then remove the impact guard.
- When installing push from the outside toward the inside with the clips.
3 - Hood
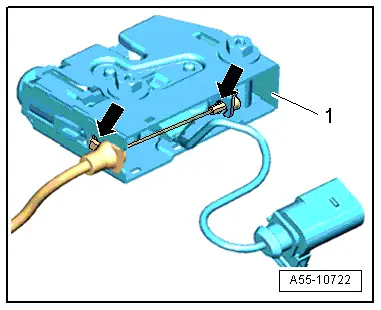
Hood Latch, Removing and Installing
Removing
- Remove the lock carrier cover. Refer to → Chapter "Lock Carrier Cover, Removing and Installing, Vehicles through MY 2014".
- Left: Remove the washer fluid reservoir filler neck. Refer to → Electrical Equipment; Rep. Gr.92; Overview - Windshield Washer System.
- Disconnect the connector -4- from the anti-theft alarm system.
- Disconnect the connector from the lock carrier.
- Remove bolts -3-.
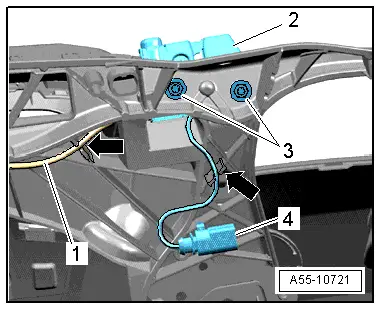
- Disconnect the hook from the cable -left arrow- and remove it with the guide downward from the hood latch -1-.
- Disconnect the release cable from the release lever -right arrow-.
Installing
Install in reverse order of removal. Note the following:
 Note
Note
Move the hood latch in the oblong holes in the lock carrier to adjust the height of the hood.
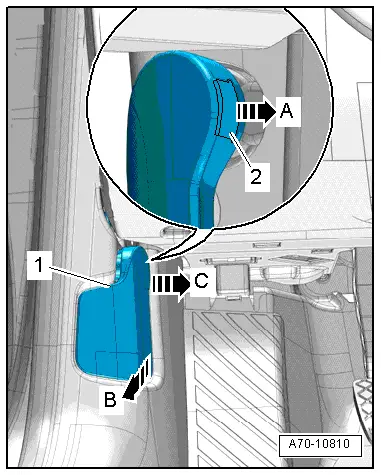
Hood Release Lever, Removing and Installing
Removing
- Pull the securing clip -2- out of the operating lever -1- slightly -arrow A- using a small screwdriver.
- Pull the operating lever back -arrow B- to release the hood and hold it in this position.
 Caution
If the operating lever is pulled out crooked, the mount could be damaged.
- At the same time, pull the operating lever level with the center of the vehicle and out of the mount -arrow C-.
Installing
Install in reverse order of removal.
READ NEXT:
 Release Cable, Removing and Installing
Release Cable Coupling
- Remove clips -1- and lift the release
cables -8- and -9-
on both sides toward the hood latches.
- To remove the coupling -2-, release the
retainers -arrows
Hinges, Removing and Installing
1 - Hood Hinge
Removing
Before removing a hood hinge, support the hood or secure it against
falling.
Remove the gas-filled strut. Refer to
→ Chapter "Gas-Filled Strut,
Overview - Rear Lid
Overview - Rear Lid
1 - Rear Lid
Removing and installing. Refer to
→ Chapter "Rear Lid, Removing and Installing".
Rear Lid Seal, Removing and Installing. Refer to
→&nbsSEE MORE:
All wheel drive (quattro)
Description
Applies to: vehicles with all wheel drive
The all-wheel drive system distributes the driving
power variably to the front and rear axle to improve
the driving characteristics. It works together
with selective wheel torque control, which can
activate when driving through curves.
The all-
Wheel bolts and rims
Wheel bolts
Wheel bolts must be clean and loosen/tighten
easily.
Rims
Rims with a bolted rim ring or with bolted wheel
covers consist of multiple pieces. These components
were bolted together using special bolts and a special procedure. You must not
repair or
disassemble them.
WARNING
Wheel bolts t