Audi Q3: Rear Window
Overview - Rear Window
 Note
Note
- There may be connections in the rear window delivery package that are only necessary for some optional equipment.
- Remove any unnecessary cable ends directly at the connection on the rear window.
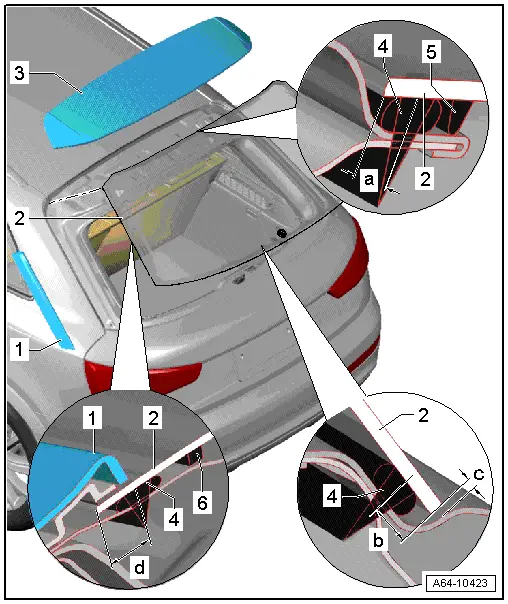
1 - Rear Window Spoiler
- Removing and installing. Refer to → Chapter "Rear Window Spoiler, Removing and Installing".
2 - Rear Window
- Before removing, disconnect all electrical connectors and secure the terminals to the middle of the window on the inside using adhesive tape.
- Rear lid distance dimension -c- = 2 mm
- Center window along sides.
3 - Spoiler on Roof Edge
- Removing and installing. Refer to → Chapter "Roof Edge Spoiler, Removing and Installing".
4 - Adhesive Bead
- Applying adhesive. Refer to → Chapter "New Window Glass, Preparing for Installation"
- Observe the minimum curing time. Refer to → Chapter "Minimum Curing Time for Bonded Windows".
- Distances measured from the window edge to the center of the bead of adhesive:
- Dimension -a- = 8 mm
- Dimension -b- = 12 mm
- Dimension -d- = 12 mm
5 - Spacer
- Included in the delivery of the rear window
6 - Adhesive Stop Profile
- On the side, the adhesive end profile directly next to the rail for the window defroster to the edge of the glass
Rear Window, Removing and Installing
Undamaged Window, Removing
- Remove the roof edge spoiler. Refer to → Chapter "Roof Edge Spoiler, Removing and Installing"
- Remove the spoiler on the rear window. Refer to → Chapter "Rear Window Spoiler, Removing and Installing"
- The rear window wiper is removed. Refer to → Electrical Equipment; Rep. Gr.92; Rear Window Washer System; Windshield Wiper Arm, Removing and Installing
- Remove the rear lid trim panel. Refer to → Body Interior; Rep. Gr.70; Luggage Compartment Trim Panels; Rear Lid Upper Trim Panel, Removing and Installing
- Disconnect rear window defroster and window antenna connectors and secure to center of window with adhesive tape.
 WARNING
When removing a window, always wear protective eyewear and leather gloves.
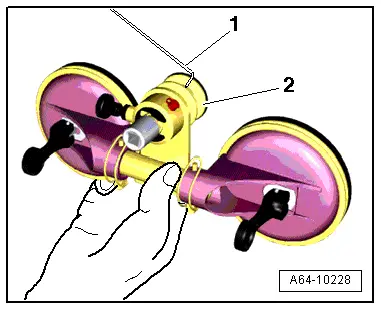
- Unroll with the Cutting Tool for Bonded Windows - Wire Reel -VAS6452/1- approximately 6.5 meters of cutting wire (approximately six turns) and cut it.
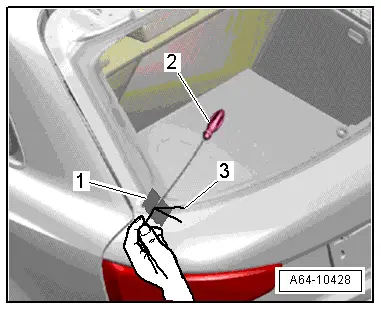
- Cover the awl outlet under the body flange with tape -1- to prevent damaging it.
- Feed both cutting wire ends -3- into the awl -2- and pull it in.
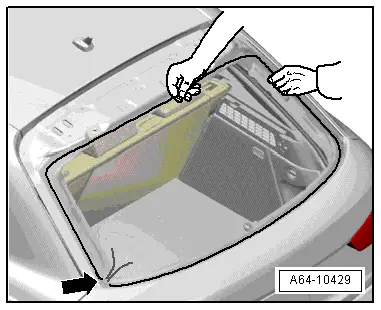
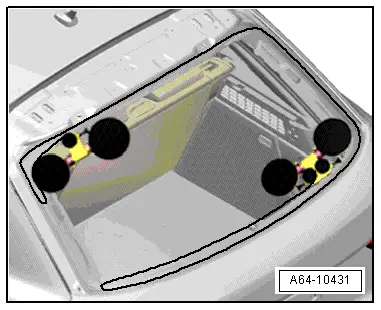
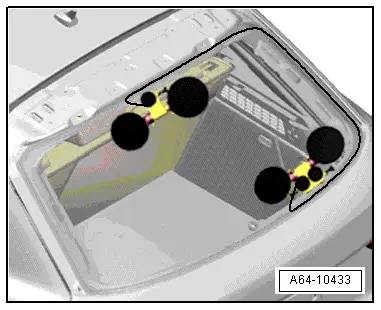
- Place the cutting wire all the way around under the windshield as illustrated.
- Route cutting wire around rear window under the glass as shown in the illustration.
 Caution
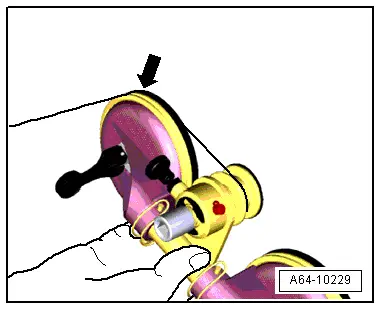
The ends of the wire must not be twisted when cutting through the adhesive -arrow-.
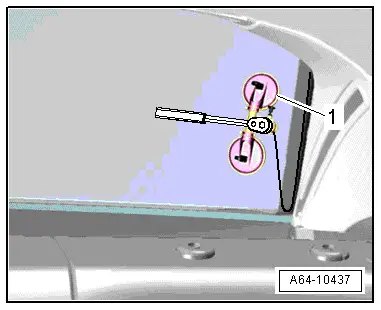
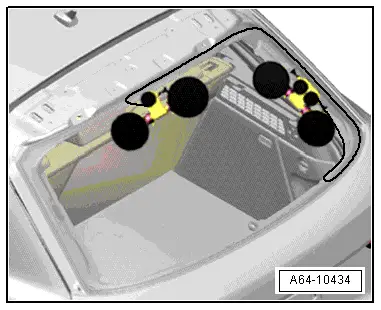
- Mount both reel devices on the inside of the windshield as illustrated.
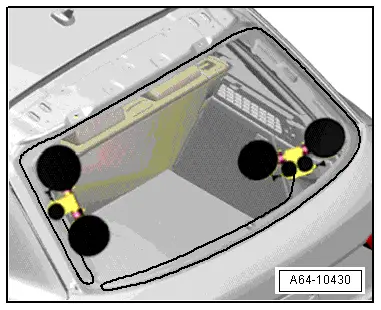
- Insert the ends of the cutting wire -1- into the reel device -2-
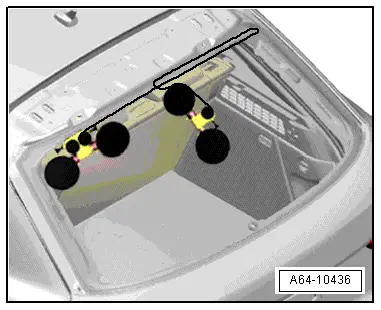
- Cut free the windshield along the "D-pillar" upward.
- Move the reel device as illustrated.
- The wire is guided into the integrated roller -arrow- on the spool.
- Cut the window free on the left upper corner.
- Move the reel device as illustrated.
- Cut the window free on the upper edge of the glass to the right.

- Cut the window free on the lower edge of the glass to the right.
- Place the reel device as shown on the D-pillar.
- Cut the window free on the right lower corner.
- Place the reel device as shown upward and cut free the window glass at the D-pillar.
- Cut the window free on the right upper corner.

- Move the right on the right side reel device over the left one as illustrated and cut free the window completely.
- Lift the window out of the rear lid using the suction cups.
Damaged Rear Window, Removing
 WARNING
When removing a window, always wear protective eyewear and leather gloves.
- Protect body and interior from glass splinters.
- Remove glass pieces from adhesive material.
- Disconnect rear window defroster and window antenna connectors.
- Bond flange all around with fabric reinforced adhesive tape.
- Cut through the adhesive sealing material (with glass residue) in the from window opening using Window Cutter - VAG1561A- and Cutting Blade, Bent at Right Angle - VAG1561/10-
Rear Window, Installing
- Installing. Refer to → Chapter "Bonded Window Glass Installation Instructions".
- Prepare the new window for installation. Refer to → Chapter "New Window Glass, Preparing for Installation".
- Prepare the undamaged window for installing. Refer to → Chapter "Undamaged Window Glass, Preparing for Installation".
- Prepare the body flange for installation. Refer to → Chapter "Body Flange, Preparing for Installation".
- Insert the rear window into window cut-out using suction cups.
 Caution
- The window must be installed within 15 minutes or the adhesive sealing material will not adhere properly.
- The rear window must be installed in the centered to the rear window wiper arm.
- Center window along sides.
- Minimum curing time. Refer to → Chapter "Minimum Curing Time for Bonded Windows".
READ NEXT:
 Door Windows
Overview - Front Door Window
1 - Door Window
Removing and installing. Refer to
→ Chapter "Front Door Window, Removing and Installing".
2 - Door
3 - Dr
Overview - Radiator Grille
Overview - Radiator Grille, Vehicles through MY 2014
1 - Audi Rings
Removing and installing. Refer to
→ Chapter "Front Emblem, Removing and Installing".
2 - RighSEE MORE:
Backrest Adjuster, Removing and Installing
Backrest Adjustment Hand Wheel, Removing and Installing
Note
Only the hand wheel for the backrest adjustment wheel can be
removed and installed.
Special tools and workshop equipment
required
Assembly Tool -3399-
Removing
- Move the front seat all the way forward/up.
-&n
Overview - Heater and A/C Unit Attachments and Air Intake Housing
Overview - Heater and A/C Unit Attachments and Air Intake Housing
1 - Sealing Plug
Equipment version
2 - Screw
1.5 Nm
3 - Screw
1.5 Nm
4 - Air Guide Channel to Left Footwell Vent
5 - Air Distribution Housing
The