Audi Q3: Overview - Sunroof
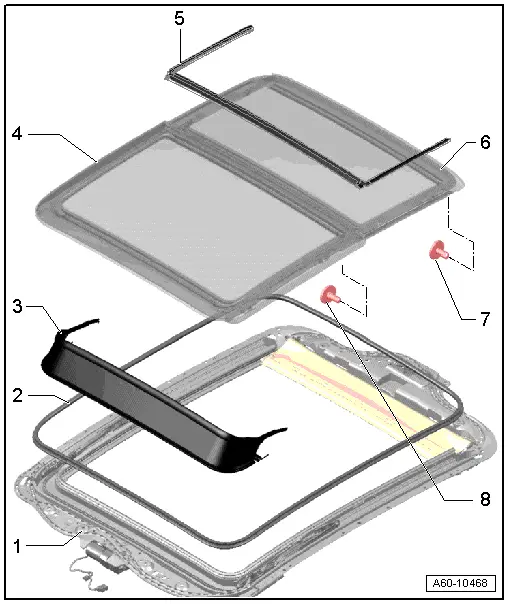
1 - Panorama Roof Frame
- Removing. Refer to → Chapter "Sunroof Frame, Removing and Installing".
2 - Seal
- Open the panel "1" completely and remove the seal.
- When installing, first position is on the front side, then push it to the rear under the panel "2" and press it all the way around onto the flange.
3 - Wind Deflector
- Removing. Refer to → Chapter "Wind Deflector, Removing and Installing".
4 - Panel "1"
- Removing. Refer to → Chapter "Panel 1 for the Panorama Roof, Removing".
5 - Panel Seal
- Removing. Refer to -item 3-.
6 - Panel "2"
- Removing. Refer to → Chapter "Panel 2 for the Panorama Roof, Removing".
7 - Bolt
- 3 Nm
8 - Bolt
- 7 Nm
Overview - Sunroof Shade
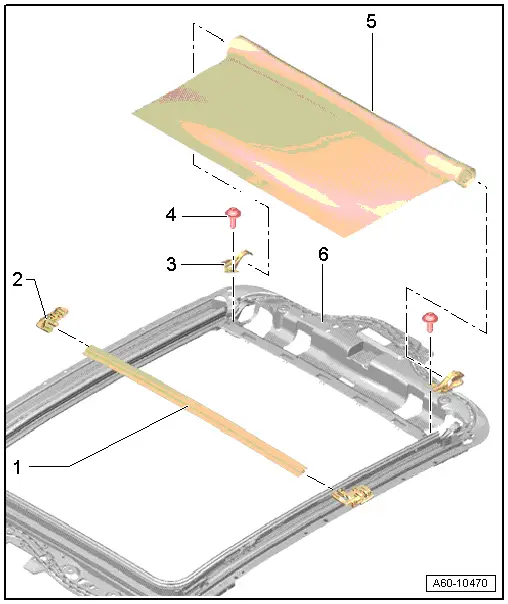
1 - Bow
2 - Sunroof Shade Cable Coupling Plate
- Can only be replaced with the cable.
- Removing, refer to → Chapter "Sunroof Shade Cable, Replacing"
3 - Cable Cover
4 - Bolt
- 1 Nm
5 - Sunroof Shade
- Removing, refer to
→ Chapter "Sunroof Shade, Removing and Installing"
- Remove the side rail from the material for the sunroof shade.
6 - Panorama Sunroof Frame
READ NEXT:
 Sunroof Frame, Removing and Installing
1 - Bolt
3 Nm
2 - Power Sunroof Control Module -J245-.
Performing the adaptation procedure. Refer to
→ Chapter "Motor Adaptation".
3 - Bolt
Glass Panel, Removing and Installing
Panel 1 for the Panorama Roof, Removing
Caution
Do not move or operate the already removed panel
otherwise it may become damaged.
Note
If the screws for the panel mounting wer
Sunroof Seals, Removing and Installing
Installing the Panel Seal
Note
Spray the seal with soapy solution to make the installation
easier.
- Align the seal in the center to the panel and push it into
the both front guidSEE MORE:
Driving with a trailer
General information
Your vehicle is primarily intended for transporting
people and luggage. However, if you drive
with a trailer, follow the technical requirements,
the operation and driving tips, and the legal regulations.
Driving with a trailer affects the vehicle's energy
usage, performance, and
Spare tire
Removing the subwoofer
Applies to: vehicles with subwoofer
The subwoofer must be removed before the
spare tire/temporary spare tire can be removed.
Fig. 166 Spare tire well: subwoofer
Removing the subwoofer
Pull out the red connector lock 1.
Remove the connector 2 and set the disconnected
cable
© 2019-2026 Copyright www.auq3.net | 0.0094
