Audi Q3: Front Door Trim Panel, Removing and Installing
Special tools and workshop equipment required
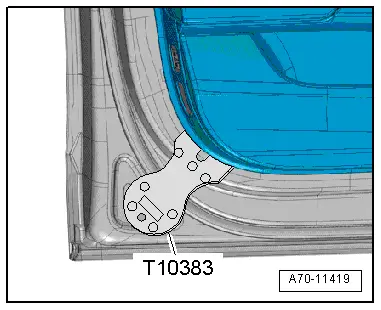
- Wedge Set -T10383-
Removing
- Switch the ignition off and remove the ignition key.
- Remove the trim panel. Refer to → Chapter "Trim Molding, Removing and Installing".
- Remove the pull handle grip recess. Refer to → Chapter "Pull Handle Grip Recess, Removing and Installing".
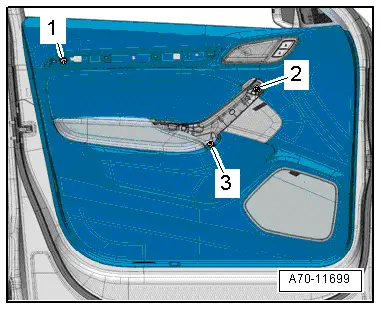
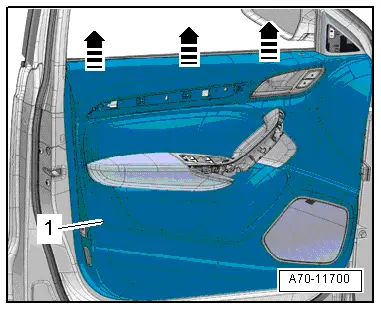
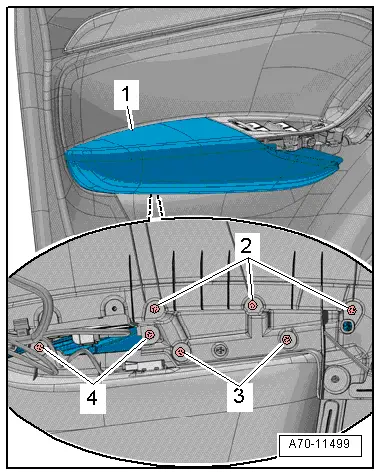
- Remove the bolts -1 to 3-.
 Note
Note
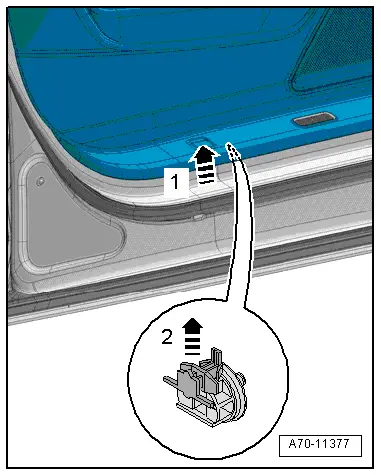
A two-part clip sits in the center of the door trim at the bottom. This clip must be released before the six "normal" one-piece clips are unclipped.
- At the impression down beside the entry light, press hard against the door trim with thumb -arrow 1-. The two-piece clip is released as a result -arrow 2-.
- Using the Wedge -T10383- unclip at lower rear in the radius beginning from the door by inserting the wedge between door trim and door in the area of the retaining clip.
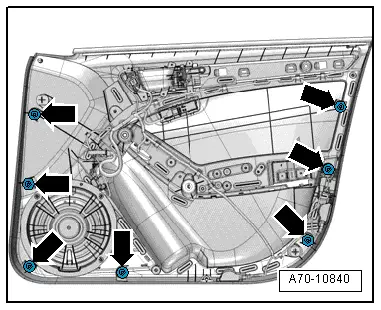
- Position of the remaining clips -arrows-.
- Pull the door trim panel -1- approximately 15 mm off the door all the way around.
- The clips must not be left in the inside the door.
- Disengage and remove the upper door trim panel from the door -arrows- on the window recess.
- Unclip the cable -3- carefully from the interior door mechanism -2-.
- Swivel the interior door mechanism cable toward the inside -arrow-.
- Disengage the ends of the cable -1- from the inside door release mechanism.

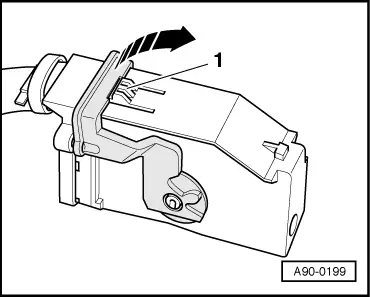
- To disconnect the connector, press the catch -1-, rotate the retaining bracket in the direction of -arrow- and remove the connector.
- Remove the door trim.
Installing
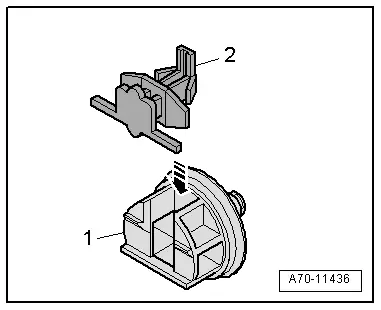
- Replace two-part clip by detaching lower part -1- from the door from the rear side and removing upper part -2- from the door trim.
- Assemble two-part clip -arrow- and insert in the door trim.
- Engage the ends of the cable -1- in the inside door release mechanism lever.
- Attach the interior door mechanism cable -3- to the interior door mechanism -2-.
- The cable must engage audibly.

Clip Locations
 WARNING
- For proper crash sensor (pressure sensor) function, ensure door does not leak.
- The door trim clips -arrows- seal the system. Replace the door trim clips if necessary.
- Connect the connectors on the door control module.

- Position the door trim on the window recess and press it down firmly.
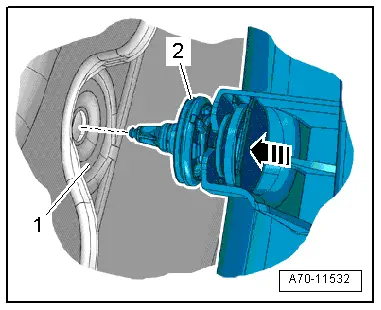
- Carefully position the door trim panel clips -2- all around the door and press the door trim onto the door -1- until it engages audibly on the mounting points -arrows-.
Install in reverse order of removal.
Installation notes, for example tightening specifications, replacing components. Refer to → Chapter "Overview - Front Door Trim Panel".
Front Armrest, Removing and Installing
Removing
- Remove the front door trim panel. Refer to → Chapter "Front Door Trim Panel, Removing and Installing".
- Remove insulation mat.
- Remove the bolts -2 through 4- on the rear of the door trim.
- Remove the armrest -1- from the door panel.
Installing
Install in reverse order of removal.
Installation notes, for example tightening specifications, replacing components. Refer to → Chapter "Overview - Front Door Trim Panel".
READ NEXT:
 Front Pull Handle, Removing and Installing
Front Pull Handle, Removing and Installing
Removing
- Remove the armrest. Refer to
→ Chapter "Front Armrest, Removing and Installing".
- Disconnect the connector for the window r
Overview - Rear Door Trim Panel
1 - Pull Handle
With switch mount
Removing and installing. Refer to
→ Chapter "Rear Pull Handle, Removing and Installing".
2 - Left Rear Entry Lamp -W33-
Ri
Interior Door Mechanism, Removing and Installing
Removing
- Remove the rear door trim panel. Refer to
→ Chapter "Rear Door Trim Panel, Removing and Installing".
- Remove insulation mat.
- Disconnect and free up the connecto
SEE MORE:
Online roadside assistance
Description
Applies to: vehicles with online roadside assistance
An online roadside assistance call1) is a combination
of data transmission and a phone call. The
data transmission from your vehicle forwards important
information to the Audi service center,
such as the vehicle and position data.
1) T
Tread Depth, Measuring
Tread Depth, Measuring
Note
When measuring tread depth, take measurements in the main
grooves.
Do not measure on the TWI (tread wear indicator).
Tread depth of a tire must be measured in the main grooves
at the points showing the most wear. Main tread grooves can be
recogniz
