Audi Q3: Wheel, Changing and Mounting
Special tools and workshop equipment required
- Torque Wrench 1332 40-200Nm -VAG1332-
- Wheel Lock Set -T10101-
- Wheel Lock Set -T10101A-
- Wheel Lock Set -T40004-
- Wheel Lock Set -T40073-
- Wax Spray -D 322 000 A2-
- Optimol TA Paste -G 052 109 A2-
 Note
Note
The wrench size of the included wheel bolt adapter can be vary from the wrench size of the respective master set.
Wheel, Changing
 Caution
If brake pads are ceramics, wheel must not fall on brake disc, otherwise it will be irreparably damaged. To remove/mount a wheel, install the long assembly pin instead of wheel bolts at the top position (12 o'clock position) and insert the short assembly pin in the wheel bolt mounts for support. In this way, the wheel can glide on the assembly aids when removing/installing.
 Note
Note
- Only raise vehicle at designated mounting points.
- On vehicles with alloy wheels, do not pry out cover caps with a screwdriver but rather use only the special tool designed for this (puller hook in vehicle tool kit).
- To loosen wheel bolts, use sockets in the correct size. Sockets that did not fit must not be used any more.
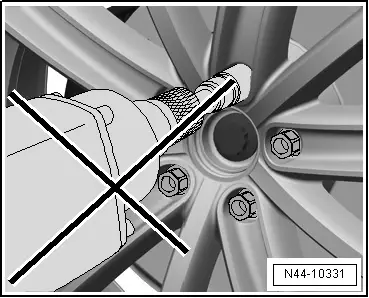
- Do not use an impact wrench to loosen anti-theft wheel bolts (lockable wheel bolts).
- Do not make wheel bolts dirty.
 DANGER!
The secure seating of the wheel bolts and the wheels is only ensured if the instructions and checks below are followed.
The following checks and instructions must be performed with wheel (rim) removed!
 DANGER!
In order to make sure the wheel bolts fit correctly, be use to use the correct wheel bolts specified for the model. The wheel bolts for each model have different diameters on the surface of the ball running surface on the wheel rim and they have different lengths.
- Check if the contact surfaces -arrows- between the brake disc/wheel hub brake disc/brake drum and the wheel (rim) are free of corrosion and dirt.
- If necessary, remove oil, grease, grease and corrosion.
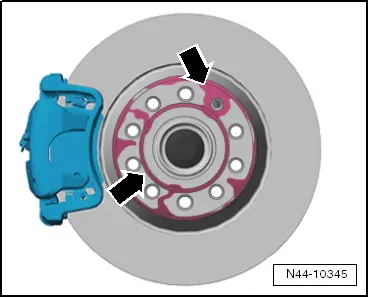
- Make sure there is no corrosion or dirt on the center of the wheel hub -arrows-.
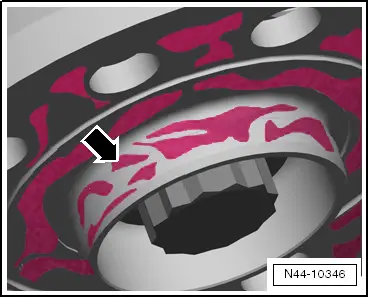
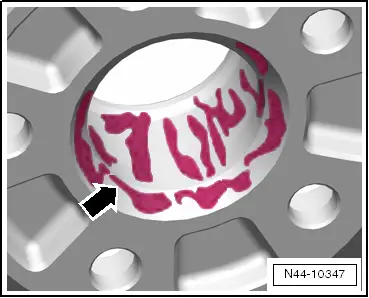
- Make sure the contact surfaces -arrow- on the wheel inner side (rim) as well as the central seat in the rim is free of corrosion and dirt.
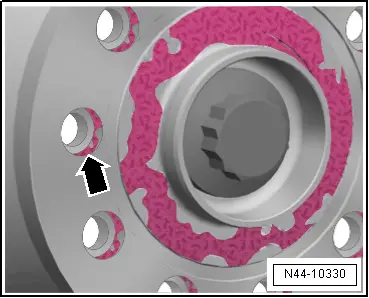
- The spherical caps in the wheel bolt holes must not have any corrosion, dirt, oil or grease on them.
- If necessary, remove oil, dirt and corrosion and reapply corrosion protection in centering seat area with Wax Spray -D 322 000 A2-.
 Note
Note
- The wax spray must not get onto brake system parts.
- If rust or dirt falls between brake disc and wheel hub during removal, remove it by blowing out with compressed air.
 DANGER!
Wear protective eyewear when working with compressed air.
The wheel (rim) spherical caps and wheel bolts must be free of dirt and corrosion.
- Dirty wheel (rim) spherical caps should be cleaned with a lint-free cloth.
- Check wheel bolts and wheel hub threads for cleanliness.
- Clean dirty wheel bolts in spherical cap area and threads, for example, with a brass brush.
 WARNING
Heavily corroded or damaged wheel bolts must be replaced.
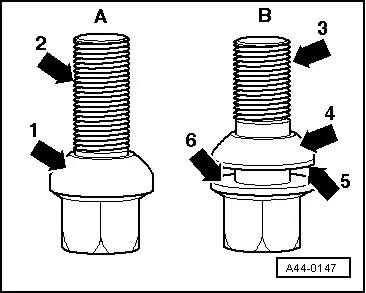
If lightly corroded wheel bolts are reused, they must be cleaned in area of spherical cap and threads and Optimol AT -G 052 109 A2- paste must be applied to slide surfaces as follows (all vehicles except RS 2 and RS 4, type 8D):
A - One-part wheel bolt. Lightly lubricate threaded area -2- and spherical cap -1-.
B - Two-part wheel bolt. Lightly lubricate threaded area -3- as well as between bolt head contact surface -6- and spherical cap ring -5-. The spherical cap to wheel (rim) contact surface -4- must not be lubricated.
 Note
Note
Only use Optimol TA -G 052 109 A2- paste. The paste must not get on brake system parts.
Only for RS 2 and RS 4 type 8D:
- Lightly corroded wheel bolts must not be cleaned and lubricated. These wheel bolts should be replaced.
- Install wheel bolts dry.
All Vehicles
- Check whether the wheel bolts can be easily installed by hand without tools. It must be easy to install the wheel bolts the entire length of the threads when installing the wheel.
- Make sure that threads align with the hub. The threads of the wheel bolts must not touch the holes in the brake disc.
- If the thread of the wheel bolt touches the hole, turn the brake disc relative to the wheel accordingly.
Wheel Mounting
 Note
Note
- Be careful not to scratch off the glued- on wheel trim on these rims.
- The surface of the wheel trim is very sensitive.
- The rim will have be replaced if the wheel trim is damaged.
- The wheel trim cannot be replaced.
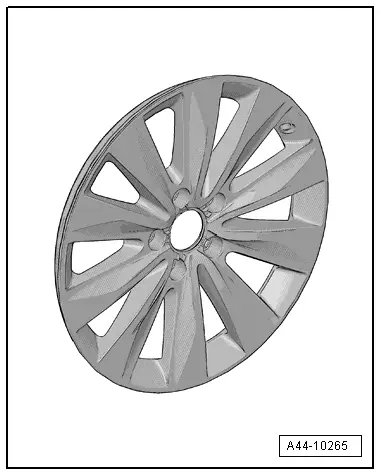
- Place wheel on wheel hub and secure it by hand with two wheel bolts on opposite sides.
- Install remaining wheel bolts by hand, they must be easy to install. Make sure that they are centered exactly.
- Take load off wheel if necessary by raising slightly and lightly tighten two wheel bolts by hand.
- When mounting a wheel, tighten all wheel bolts uniformly by hand.
- Tighten the wheel bolts diagonally using, for example, a four-way lug wrench, to about 30 Nm.
 Note
Note
Make sure the correct wheel bolts are installed. Refer to the Parts Catalog.
 WARNING
Do not use an impact wrench to install the wheel bolts.
- Lift the wheel slightly to take the pressure off it.
- Lower the vehicle to the floor and tighten diagonally all wheel bolts to the specified wheel bolt tightening specification.
- Lower the vehicle onto its wheels. Refer to → Suspension, Wheels, Steering; Rep. Gr.44; Vehicle Alignment.
Run-Flat Tires, Removing and Mounting
 Caution
It is mandatory for run-flat tires to have a tire pressure monitoring system in the vehicle.
Safety Precautions, Run-flat tires. Refer to → Chapter "Safety Precautions, Run-Flat Tires".
Installation instructions, run-flat tires. Refer to → Chapter "Installation Instructions, Run-Flat Tires".
Pressing off tires, run-flat tires. Refer to → Chapter "Pressing Off Tires, Run-Flat Tires".
Removing tires, run-flat tires. Refer to → Chapter "Removing Tires, Run-Flat Tires".
Installing tires, run-flat tires. Refer to → Chapter "Tires, Mounting, Run-Flat Tires".
Safety Precautions, Run-Flat Tires
 Caution
It is mandatory for run-flat tires to have a tire pressure monitoring system in the vehicle.
- Work for removing and mounting tires with emergency running characteristics must only be performed by mechanics specially trained for it.
- The special tools necessary must be in proper working order and not damaged! Contact manufacturer of tire mounting device found in the workshop directly for suitable additional tools. Additional tools are offered as recommended accessories for the tire mounting devices listed with VAS - numbers.
- If necessary, use a mounting paste recommended by the tire manufacturer.
- The description of work procedure for removing and mounting may vary depending on the device manufacturer and type of device.
- The following work procedure described explains the principal procedure for removing and mounting tires with emergency running characteristics. It is important to recognize run-flat tires before starting the removal and mounting process as it will be different from the process used with standard tires.
- Characteristics: these tires are identified with the following abbreviations: DSST, Euforia, RFT, ROF, RSC, SSR or ZP. These abbreviations are located on the tire flank behind tire designation of the respective tire manufacturer.
- Always note the instructions and danger warnings identified in the following description!
- Check whether tire pressure sensor should be replaced (if equipped) the Vehicle Diagnostic Tester.
 Note
Note
- During removal and mounting work, make sure that no contact is made between tires and tire pressure sensor.
- When cleaning disc wheel (rim), tire pressure monitor sensor must not come into contact with water or be blown with pressurized air.

