Audi Q3: Roof Bars/Roof Rails
Overview - Roof Railing
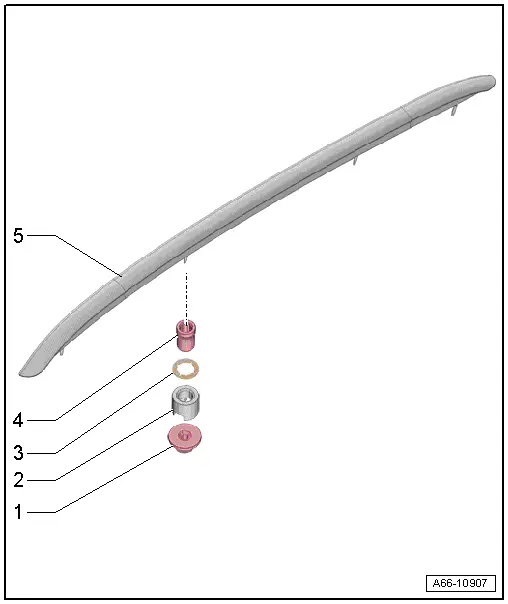
1 - Nut
- Quantity: 4
- Install with locking compound. For the correct locking compound, refer to the Parts Catalog.
- Tightening sequence. Refer to → Fig. "Roof Rail - Tightening Specification and Sequence"
2 - Balancing Element
- Quantity: 4
- Removing and installing. Refer to → Chapter "Balancing Element, Removing and Installing".
3 - Seal
- Quantity: 4
- Replace if damaged
4 - Adjusting Screw
- 0.4 Nm
- Quantity: 4
- Install with locking compound. For the correct locking compound, refer to the Parts Catalog.
5 - Roof Railing
- Removing and installing. Refer to → Chapter "Roof Railing, Removing and Installing".
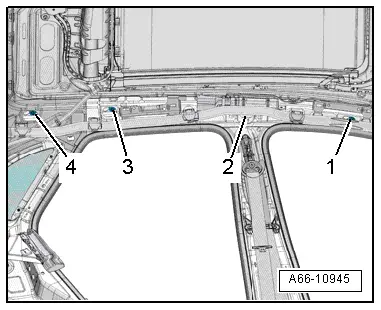
Roof Rail - Tightening Specification and Sequence
- Tighten the nuts to 10 Nm in the sequence -2, 3, 4, 1-.
Overview - Roof Trim Molding
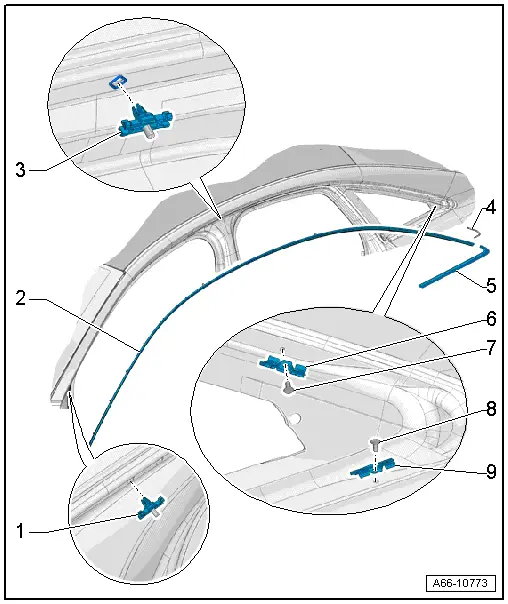
1 - Expanding Clip
2 - Roof Trim Molding
- Removing and installing. Refer to → Chapter "Roof Trim Molding, Removing and Installing".
3 - Expanding Clip
- Quantity: 11
4 - Seal
- For the side window trim molding
- Self-adhesive
5 - Side Window Trim Molding
- Removing and installing. Refer to → Chapter "Trim Molding, Removing and Installing".
6 - Clip
- Quantity: 3
7 - Blind Rivet
- Quantity: 3
8 - Blind Rivet
- Quantity: 3
9 - Clip
- Quantity: 3
READ NEXT:
 Roof Railing, Removing and Installing
Roof Railing, Removing and Installing
WARNING
Follow all Safety Precautions when working with
pyrotechnic components. Refer to
→ Body Interior; Rep. Gr.00; Safety Prec
Exterior Rearview Mirror
Overview - Exterior Rearview Mirror
1 - Bolt
1 Nm
2 - Mirror Adjusting Unit
Removing and installing. Refer to
→ Chapter "Mirror Adjusting Unit, Removing and
Wheel Housing Liner
Overview - Front Wheel Housing Liner
1 - Front Wheel Spoiler
Removing and installing. Refer to
→ Chapter "Front Wheel Spoiler, Removing and Installing".
2 - BoltSEE MORE:
Using adaptive cruise assist
Applies to: vehicles with adaptive cruise assist
Fig. 99 Lever: using adaptive cruise
assist
Fig. 100 Operating lever: changing the speed
Switching on
To switch on the adaptive cruise assist, pull the
lever up to position 1 until it engages.
Storing the speed and activating regulation
If you
Overview - Window Regulator
1 - Door
2 - Window Regulator
Removing and installing. Refer to
→ Chapter "Window Regulator, Removing and Installing".
3 - Nut
6 Nm
4 - Cap
5 - Window Regulator Motor
Left Rear Window Regulator Motor -V26-
Right Rear
© 2019-2026 Copyright www.auq3.net | 0.0121
