Audi Q3: Overview - Window Regulator
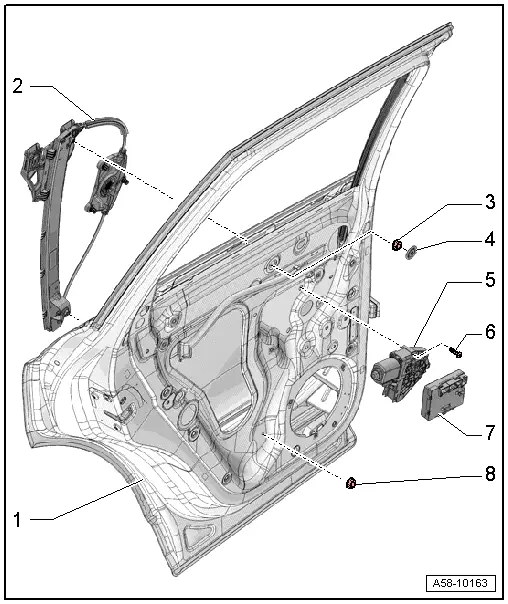
1 - Door
2 - Window Regulator
- Removing and installing. Refer to → Chapter "Window Regulator, Removing and Installing".
3 - Nut
- 6 Nm
4 - Cap
5 - Window Regulator Motor
- Left Rear Window Regulator Motor -V26-
- Right Rear Window Regulator Motor -V27-
- Removing and installing. Refer to → Chapter "Window Regulator Motor, Removing and Installing".
6 - Bolt
- 3.5 Nm
- Quantity: 3
7 - Door Control Module
- Left Rear Door Control Module -J388-
- Right Rear Door Control Module -J389-
- Overview. Refer to → Chapter "Component Location Overview - Central Locking".
8 - Nut
- 6 Nm
Overview - Window Guides and Window Shaft Strips
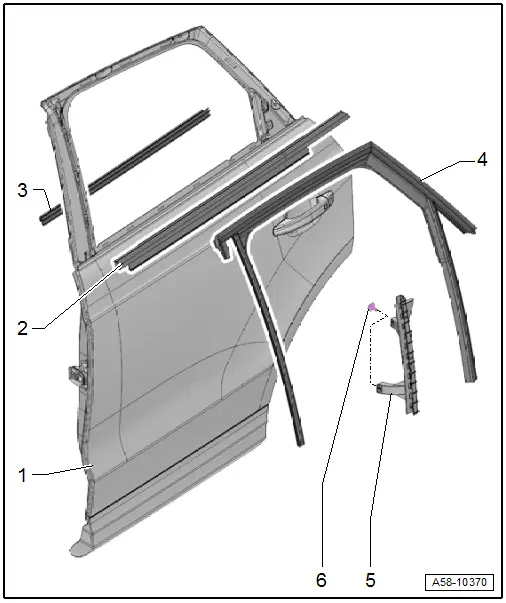
1 - Door
2 - Outer Window Shaft Strip
- Removing and installing. Refer to → Chapter "Outer Window Shaft Strip, Removing and Installing".
3 - Inner Window Shaft Strip
- Removing and installing. Refer to → Chapter "Inner Window Shaft Strip, Removing and Installing".
4 - Window Guide
- Removing and installing. Refer to → Chapter "Window Guide, Removing and Installing".
5 - Guide Rail
- For the door window
- Removing and installing. Refer to → Chapter "Door Window Guide Rail, Removing and Installing".
6 - Bolt
- 3.5 Nm
- Quantity: 2
READ NEXT:
 Overview - Door Handle and Door Lock
Overview - Exterior Door Handle, Bracket
1 - Exterior Door Handle Trim
Removing and installing. Refer to
→ Chapter "Door Handle Trim, Removing and Installing".
2 -&nb
Window Regulator Motor, Removing and Installing
Removing
Note
The window regulator motor can be removed or installed with
the motor or door window in any position.
- Remove the rear door trim panel. Refer to
→ Body Interi
Inner Window Shaft Strip, Removing and Installing
Removing
- Remove the rear window frame trim panel. Refer to
→ Body Interior; Rep. Gr.70; Rear Door Trim Panels; Window Frame
Trim Panel, Removing and Installing.
- RemSEE MORE:
Seat Position Sensor
Overview - Seat Position Sensor
Note
The illustration shows the passenger seat position sensor with the
wiring harness.
1 - Connector
Connector station in the vehicle floor under on the sill panel under
the seat.
2 - Cable Holder/Cable Tie
Clipped in
Instrument Panel Vent, Removing and Installing
Side Instrument Panel Vent, Removing and Installing
Special tools and workshop equipment
required
Hook Tool -T40207-
Removing
Note
The vent has a hole on inside for attaching the Hook Tool
-T40207-.
- Carefully insert the Hook Tool -T40207- between the slats
and hook i
© 2019-2026 Copyright www.auq3.net | 0.0132
