Audi Q3: Interior Rearview Mirror, Removing and Installing
Removing
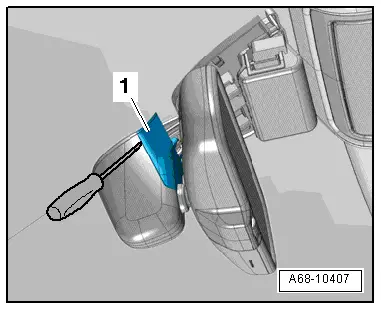
- Turn interior rearview mirror at the mirror base -1- counterclockwise -arrow- as far as the stop and remove from the retaining plate.
Interior Rearview Mirror without Optional Equipment:
 WARNING
Follow the safety precautions for the automatic dimming interior rearview mirror. Refer to → Chapter "Automatic Dimming Interior Rearview Mirror Safety Precautions".
- Pivot the interior review mirror downward until stop, approximately 25º.
- Pull the cover -2- rearward and downward -arrow- and at the same time release the catches -1- with a small screwdriver.
- Disengage the cover from the mirror base and remove.
- Remove the connector -2- from the bracket and disconnect it.
- Turn interior rearview mirror at the mirror base -1- counterclockwise -arrow- as far as the stop and remove from the retaining plate.
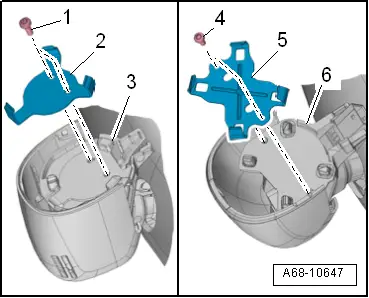
Interior Rearview Mirror with Optional Equipment, Version 1:
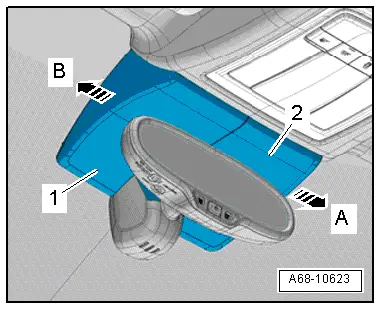
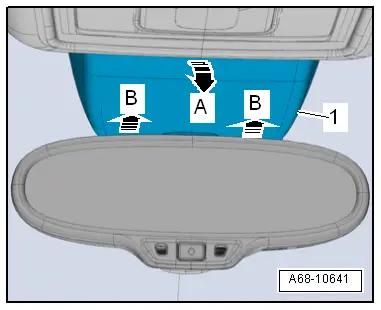
- Unclip the right cover -2- from the left cover and from the bracket -arrow A-.
- Unclip the left cover -1- from the bracket -arrow B- and remove.
- Unclip cover -1- at the mirror base using a screwdriver and remove it.
- Place a screwdriver between the retaining plate and the mirror base.
- Carefully turn the screwdriver about its axis -arrow A-, until the retaining tab disengages from the retaining plate.
- At the same time turn the mirror base -1- counterclockwise -arrow B- until stop.
- Remove the interior rearview mirror from the retaining plate and disconnect the connector -2-.
Versions with Optional Equipment, Version 2:
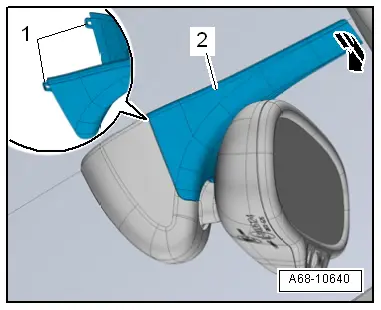
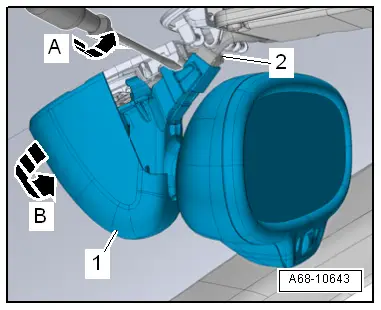
- Unclip the rear cover -1- from the headliner and pull rearward -arrow A-.
- Disengage the front cover from the front camera bracket -B arrows- and remove rearward.
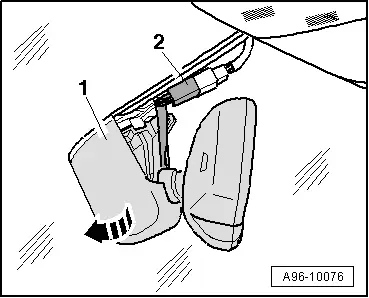
- Pull the cover -1- for the mirror base and downward -arrow- and at the same time release the catches -2- with a small screwdriver.
- Disengage the cover from the mirror base and remove.

- Place a screwdriver between the retaining plate and the mirror base.
- Carefully turn the screwdriver about its axis -arrow A-, until the retaining tab disengages from the retaining plate.
- At the same time turn the mirror base -1- counterclockwise -arrow B- until stop.
- Remove the interior rearview mirror from the retaining plate and disconnect the connector -2-.

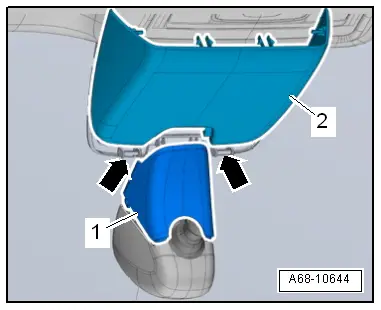
Continuation for all Mirror Versions:
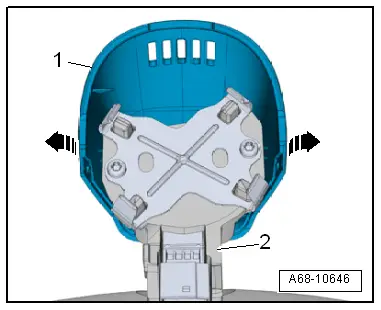
- Carefully disengage the tabs -arrows- and remove the front cover -1- downward out of the guide rods on the rearview mirror base -2-.
Installing
Install in reverse order of removal. Note the following:
- Always replace clips -2- and -5- for the interior rearview mirror if removed. Refer to the Parts Catalog for the allocation.
- Position the interior rearview mirror turned 30º with respect to the installation position.
- Turn the interior rearview mirror counterclockwise as far as stop.
Versions with Optional Equipment, Version 2:
- Install and clip in both covers.
- Engage the cover -1- for the mirror base loosely on the mirror base.
- Guide the cover -2- for the front camera over the cover for the mirror base and engage the hook on the bracket -arrows-.
Installation notes, for example tightening specifications, replacing components. Refer to → Chapter "Overview - Interior Rearview Mirror".
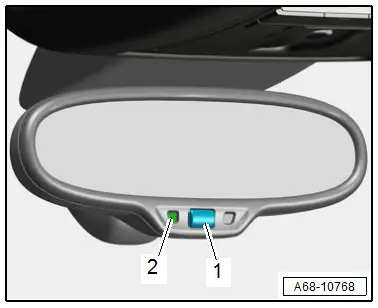
Automatic Dimming Function, Switching On and Off
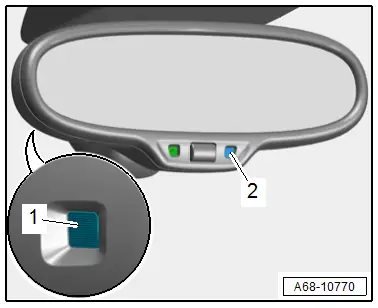
- By briefly pressing the button -1- (less than three seconds), the automatic dimming function is switched on or off automatically.
Automatic dimming "ON": the lamp in the display -2- comes on.
Automatic dimming "OFF": the lamp in the display -2- goes out.
- Automatic dimming function is activated each time "ignition is switched on".
- If the automatic dimming function is deactivated, the function is also deactivated on the exterior rearview mirror.
- In dimming mode, mirror surface lights up when interior lights are switched on or reverse gear is engaged.
- The interior rearview mirror automatic dimming function can only work properly if the rear window shade is raised.
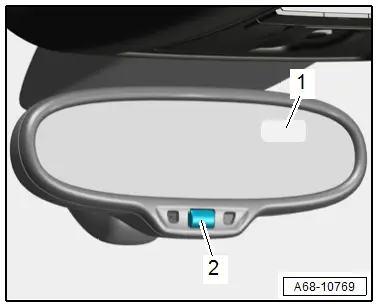
Compass Display, Switching On and Off
- Press and hold the button -2- three to six seconds. The compass display -1- changes from "ON" to "OFF" and vice versa.
Compass display "ON" - the direction is displayed.
Compass display "OFF" - the direction is not displayed.

Magnetic Fields, Setting
It is necessary to set the magnetic zone if:
- A new Automatic Dimming Interior Rearview Mirror -Y7- is installed.
- If the vehicle is driven a long distance over more than two zones from the originally set zone, then the new zone must be set again.
Magnetic Fields, Setting:
- Press button -2- for six to nine seconds until a "Z" and a magnetic zone number appear.
- Keep pressing the button until the number of the desired zone appears.
- Read desired magnetic zone on the world map:
- North America
After a few seconds, the compass display switches from the zone number to the direction.
- The interior rearview mirror automatic dimming function is reactivated after the magnetic zone is set. Refer to → Chapter "Compass Display, Switching On and Off".

Digital Compass, Calibrating
It is necessary to calibrate the digital compass if:
- The compass directions are not correct,
- The letter "C" instead of a direction will appear or the display will be blank.
- A new Automatic Dimming Interior Rearview Mirror -Y7- is installed.
The digital compass may also need to be calibrated if:
- the vehicle battery was reconnected after being disconnected for an extended period,
- a new audio system or audio system component was installed.
Digital Compass, Calibrating:
- Switch the ignition on.
- The letter "C" must appear in the compass display -1-.
- If the letter "C" does not appear, press button -2- for 9 to 12 seconds until the "C" appears in the compass display.
- Drive in a circle two to three times at about 10 km/h (5 mph) until a direction is shown in the compass display.
- The interior rearview mirror automatic dimming function is reactivated after the calibration is complete. Refer to → Chapter "Automatic Dimming Function, Switching On and Off".
Automatic Dimming Interior Rearview Mirror, Setting to LHD
It is necessary to set LHD when:
- A new Automatic Dimming Interior Rearview Mirror -Y7- is installed.
- Press the button -2- for 12 to 15 seconds until either an "L" (for LHD vehicles) or an "A" (for RHD vehicles) appears.
- Press the button again; the drive side will be changed.
- After a brief moment, the display changes automatically to "C" - for calibrating. The digital compass must now be calibrated again. Refer to → Chapter "Digital Compass, Calibrating".
- The interior rearview mirror automatic dimming function is reactivated after the calibration is complete. Refer to → Chapter "Automatic Dimming Function, Switching On and Off".

Zones, Reading in World Maps
North America

Automatic Dimming Interior Rearview Mirror, Checking Function
To check function, following conditions must be fulfilled:
- Interior rearview mirror installed.
- Ignition switched on.
- Reverse gear not engaged.
- Automatic-dimming function must be switched on, indicator light must come on.
Test Sequence
- Cover the photosensor -1- on the housing side.
- Shine a light source, such as a flashlight, on the mirror side of the photosensor -2-.
- The interior rearview mirror must dim within a short period of time.
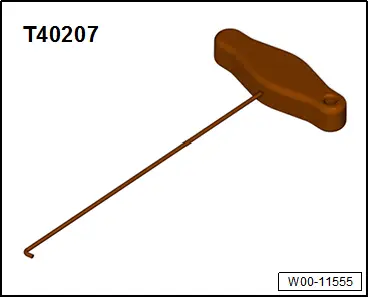
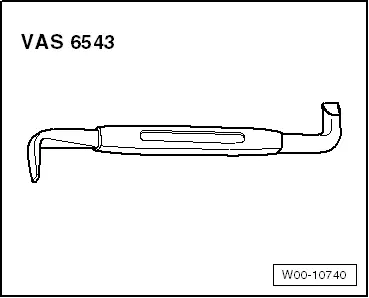
Special Tools
Special tools and workshop equipment required
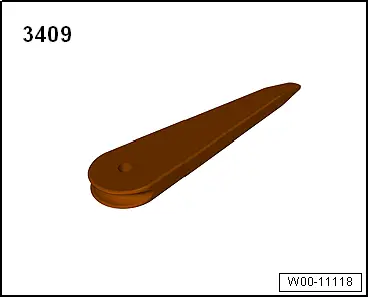
- Trim Removal Wedge -3409-
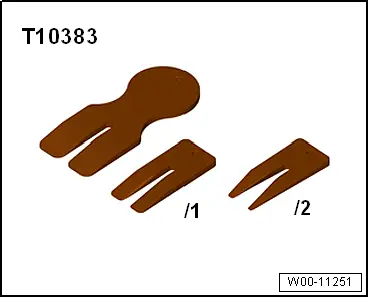
- Wedge Set -T10383-
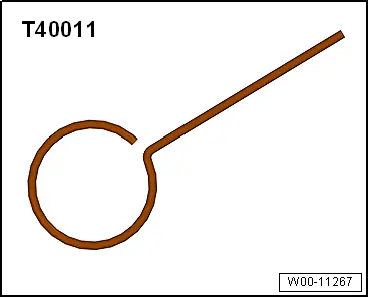
- Locking Pin (3 pc.) -T40011-
- Hook Tool -T40207-
- Angled Screwdriver -VAS6543-
READ NEXT:
 Component Location Overview - Seat Belts and Attaching Points
1 - Front Seat Belt Latch
Overview. Refer to
→ Chapter "Overview - Front Seat Belt Latch".
2 - Front Passenger Seat Belt Tensioner Igniter 2 -N298-
Only USA a
Overview - Front Three-Point Seat Belt
Overview - Front Three-Point Seat Belt, USA and Canada Market
1 - Belt End Fitting Cover
Removing and installing. Refer to
→ Chapter "Front Belt End Fitting, Removing and InsSEE MORE:
Opening business cards
Applies to: vehicles with telephone
The business card shows you details about a contact.
To open a business card, press on a contact in
the directory, or
Press in the call list 5
fig. 125.
Possible options in the business card:
Call: press on a phone number.
Storing a favorite: press .
Bumper Cover Lower Section, Removing and Installing, Audi Q3
Removing
- Remove the front bumper cover. Refer to
→ Chapter "Bumper Cover, Removing and Installing".
- Remove the front bumper cover end plate. Refer to
→ Chapter "Front Bumper Cover End Plate, Removing and
Installing".
- If equipped, disconnect the connector
