Audi Q3: Component Overview - Run-Flat Tire (PAX)
Wheel and Tire General Information / Chassis / Audi Q3 (8U) 2011-2018 Service Manual / Component Overview - Run-Flat Tire (PAX)
 Caution
It is mandatory for run-flat tires to have a tire pressure monitoring system in the vehicle.
 Note
Note
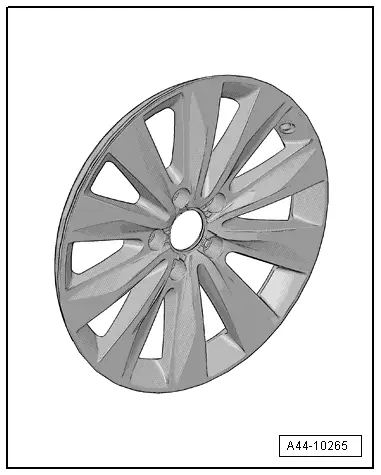
- Be careful not to scratch off the glued- on wheel trim on these rims.
- The surface of the wheel trim is very sensitive.
- The rim will have be replaced if the wheel trim is damaged.
- The wheel trim cannot be replaced.
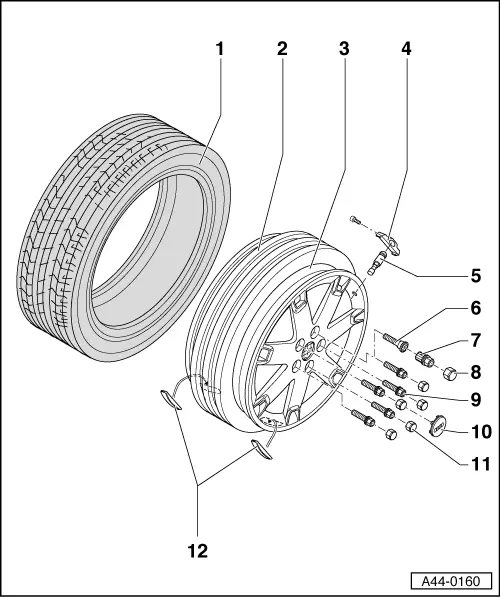
1 - PAX Tires
2 - Support Ring
3 - Wheel for PAX Tires
- Note assembly instructions. Refer to → Chapter "Wheel, Changing and Mounting"
4 - Wheel Electronics
- Batteries must be completely replaced.
- Remaining battery life, temperature and pressure can be read via diagnosis with Vehicle Diagnostic Tester.
Beru wheel electronics system. Refer to → Chapter "Wheel Electronics System (Tire Pressure Monitoring System), Beru ".
Siemens wheel electronics system. Refer to → Chapter "Wheel Electronics System (Tire Pressure Monitoring System), Siemens ".
5 - Metal Valve Body
- Only install valve according to Parts Catalog
- Delivered complete
6 - Wheel Bolt
 Note
Note
Make sure the correct wheel bolts are installed. Refer to the Parts Catalog.
- Note assembly instructions. Refer to → Chapter "Wheel, Changing and Mounting"
- Anti-theft wheel bolts. Refer to → Fig. "Anti-Theft Wheel Bolts"
- Refer to → Chapter "Wheel Bolt Tightening Specifications"
7 - Wheel Bolt Adapter
- Place on wheel bolt designed for it. Refer to → Fig. "Anti-Theft Wheel Bolts"
8 - Cap
- Place on wheel bolt
9 - Wheel Bolt, Two-Part
- Note assembly instructions. Refer to → Chapter "Wheel, Changing and Mounting"
- Refer to → Chapter "Wheel Bolt Tightening Specifications"
10 - Cap
11 - Wheel Bolt Cover Cap
12 - Adhesive Balancing Weights
- Maximum 60 grams per rim permitted
- Clean wheel where it will be adhered so it is free of dirt and grease
- Remove protective film
- Attach balance weights to intended surfaces
READ NEXT:
 Wheel, Changing and Mounting
Special tools and workshop equipment
required
Torque Wrench 1332 40-200Nm -VAG1332-
Wheel Lock Set -T10101-
Wheel Lock Set -T10101A-
Wheel Lock Set -T40004-
Wheel Lock Set -T40073-
Wax
Installation Instructions, Run-Flat Tires
Warm up cold tires to the minimum mounting temperature
Note
This applies also to ultra high performance tires
(height-/width ration smaller/same 45% and speed rating symbol
larger than/
Removing Tires, Run-Flat Tires
Note
Be careful not to scratch off the glued- on wheel trim on
these rims.
The surface of the wheel trim is very sensitive.
The rim will have be replaced if the wheel trim is damageSEE MORE:
Emergency assist
Description
Applies to: vehicles with emergency assist
General information
Within the limits of the system, emergency assist
can detect inactivity from the driver. In these instances,
the system will warn the driver, assume
control of the vehicle if necessary, and bring the
vehicle automatically to
Traffic incidents
Introduction
Applies to: vehicles with navigation system and online traffic
information
Fig. 135 Traffic information overview
Open traffic information
Requirement: the map must be displayed.
Press on the traffic jam symbol in the side
menu on the map fig. 131.
Display traffic report details
© 2019-2026 Copyright www.auq3.net | 0.01
