Audi Q3: Overview - Window Regulator
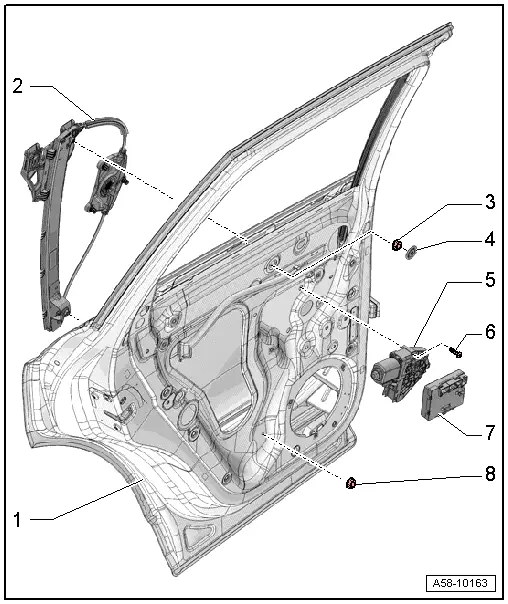
1 - Door
2 - Window Regulator
- Removing and installing. Refer to → Chapter "Window Regulator, Removing and Installing".
3 - Nut
- 6 Nm
4 - Cap
5 - Window Regulator Motor
- Left Rear Window Regulator Motor -V26-
- Right Rear Window Regulator Motor -V27-
- Removing and installing. Refer to → Chapter "Window Regulator Motor, Removing and Installing".
6 - Bolt
- 3.5 Nm
- Quantity: 3
7 - Door Control Module
- Left Rear Door Control Module -J388-
- Right Rear Door Control Module -J389-
- Overview. Refer to → Chapter "Component Location Overview - Central Locking".
8 - Nut
- 6 Nm
Overview - Window Guides and Window Shaft Strips
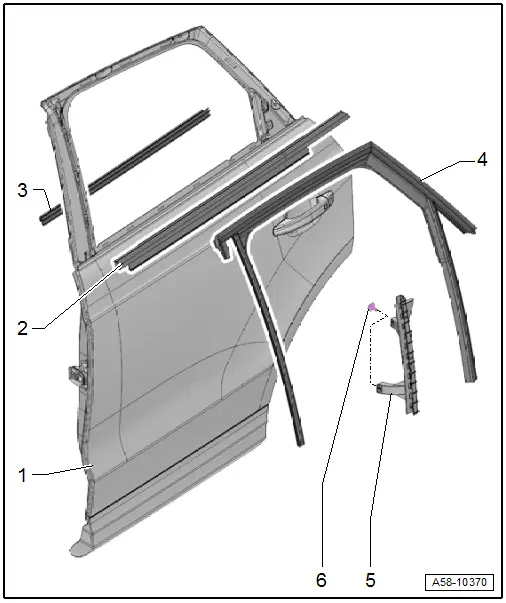
1 - Door
2 - Outer Window Shaft Strip
- Removing and installing. Refer to → Chapter "Outer Window Shaft Strip, Removing and Installing".
3 - Inner Window Shaft Strip
- Removing and installing. Refer to → Chapter "Inner Window Shaft Strip, Removing and Installing".
4 - Window Guide
- Removing and installing. Refer to → Chapter "Window Guide, Removing and Installing".
5 - Guide Rail
- For the door window
- Removing and installing. Refer to → Chapter "Door Window Guide Rail, Removing and Installing".
6 - Bolt
- 3.5 Nm
- Quantity: 2
READ NEXT:
 Overview - Door Handle and Door Lock
Overview - Exterior Door Handle, Bracket
1 - Exterior Door Handle Trim
Removing and installing. Refer to
→ Chapter "Door Handle Trim, Removing and Installing".
2 -&nb
Window Regulator Motor, Removing and Installing
Removing
Note
The window regulator motor can be removed or installed with
the motor or door window in any position.
- Remove the rear door trim panel. Refer to
→ Body Interi
Inner Window Shaft Strip, Removing and Installing
Removing
- Remove the rear window frame trim panel. Refer to
→ Body Interior; Rep. Gr.70; Rear Door Trim Panels; Window Frame
Trim Panel, Removing and Installing.
- RemSEE MORE:
High beam assistant
Applies to: vehicles with high beam assistant
The high beam assistant automatically turns the
high beams on or off depending on the surrounding
conditions.
A camera on the rearview mirror mount can detect
light sources from other road users. The high
beams switch on or off automatically depending
o
Fastening and unfastening safety belts
Fig. 60 Belt buckle and belt latch
Fig. 61 Releasing the belt buckle from the belt latch
Fastening the safety belt
Pull the safety belt by the belt buckle evenly
across your chest and lap.
Insert the belt buckle in the belt latch belonging
to the seat until it audibly engages
fig. 60.
Pull
© 2019-2026 Copyright www.auq3.net | 0.0099
