
Audi Q3: Windshield washer system
Maintenance and Care / Audi Q3 (F3) 2018-2026 Owner's Manual / Windshield washer system
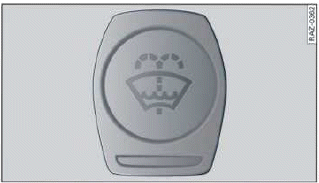
Fig. 153 Engine compartment: washer fluid reservoir cap
Observe the safety precautions.
The windshield washer reservoir  contains the
cleaning solution for the windshield/rear window
and the headlight washer system
 fig. 153.
To reduce the risk of lime scale deposits on the spray nozzles, use clean water with low amounts of calcium. Always add window cleaner to the water.
When the outside temperatures are cold, an anti-freezing agent should be added to the water so that it does not freeze.
Messages
The following messages may appear depending on the vehicle equipment:
 Please add washer fluid
Fill the washer fluid for the windshield washer system and the headlight washer system when the ignition is switched off.
Note
- The concentration of anti-freezing agent must be adjusted to the vehicle operating conditions and the climate. A concentration that is too high can lead to vehicle damage.
- Never add radiator anti-freeze or other additives to the washer fluid.
- Do not use a glass cleaner that contains paint solvents, because this could damage the paint.
READ NEXT:
 Service interval display
The service interval display detects when your vehicle
is due for service.
The service interval display works in two stages:
Inspection or oil change reminder: after driving
a certain distance, a m
Wheels and Tires
General information
The combination of a rim and tire
will be referred to as a wheel in
this Owner's Manual. If only one
of the components is referred to,
then the term tire or rim will be
used.
CheSEE MORE:
Technical data
Identification data
Vehicle data label
Fig. 176 Vehicle identification label
The vehicle identification label
fig. 176 is located
in the luggage compartment under the cargo
floor cover.
The sticker contains the following vehicle data:
Vehicle Identification Number (VIN)
Vehicle type, displace
Overview - Wheel Bearing
Overview - Wheel Bearing, Vehicles with FWD
1 - Cover
2 - Bracket
3 - Bolt
50 Nm + 45º
Always replace if removed
4 - Coupling Rod
5 - Bolt
90 Nm + 45º
Always replace if removed
Follow the tightening sequence. Refer to
6&n
© 2019-2026 Copyright www.auq3.net | 0.012
