Audi Q3: Voltage Regulator, Valeo Generator from 2001, Removing and Installing
Removing
- Remove the generator. Refer to → Electrical Equipment; Rep. Gr.27; Generator; Generator, Removing and Installing.
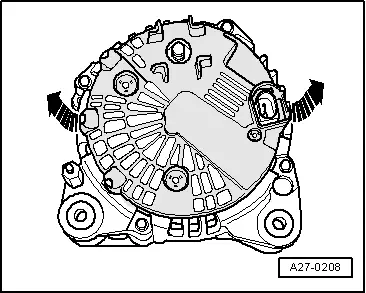
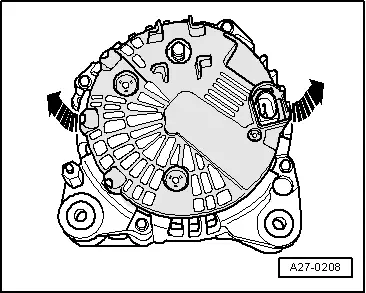
- Press the cover on the rear side of the generator off of the threaded pins -arrows-.
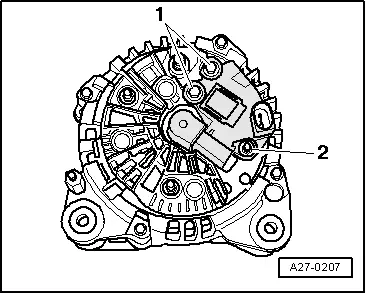
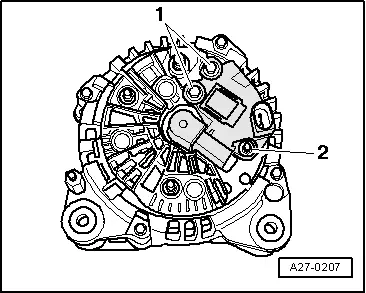
- Remove the bolts -1- and the double bolt -2-.
- Remove voltage regulator.
Installing
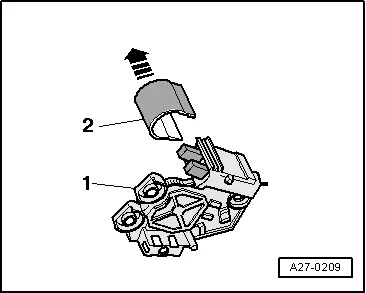
- Press the protective cap -2- off of the voltage regulator -1- in direction of -arrow-.
- When installing the voltage regulator, make sure the carbon brushes rest correctly on the slip rings.
- Install the protective cap with the voltage regulator installed.
Install in reverse order of removal, observing the following:
- Install the generator. Refer to → Electrical Equipment; Rep. Gr.27; Generator; Generator, Removing and Installing.
Carbon Brushes, Valeo Generator from 2001, Checking
Procedure
- Remove voltage regulator. Refer to → Chapter "Voltage Regulator, Valeo Generator from 2001, Removing and Installing".
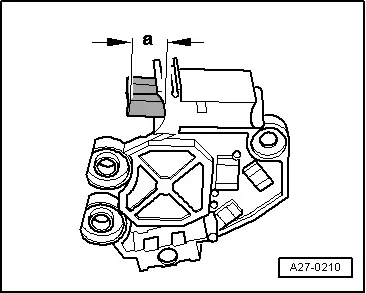
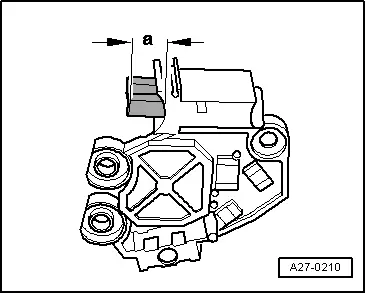
- Check the length -a- of the carbon brushes.
- Wear limit: -a- = 5 mm.
- Install the voltage regulator. Refer to → Chapter "Voltage Regulator, Valeo Generator from 2001, Removing and Installing".
Voltage Regulator, Removing and Installing, Valeo Generator from 2007
Special tools and workshop equipment required
- Feeler gauge 0.3 mm
Removing
- Remove the generator. Refer to → Electrical Equipment; Rep. Gr.27; Generator; Generator, Removing and Installing.
- Press the cover on the rear side of the generator off of the threaded pins -arrows-.
- Remove the bolts -1- and the double bolt -2-.
- Remove voltage regulator.
Installing
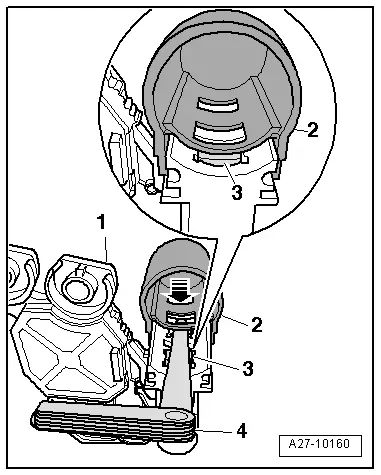
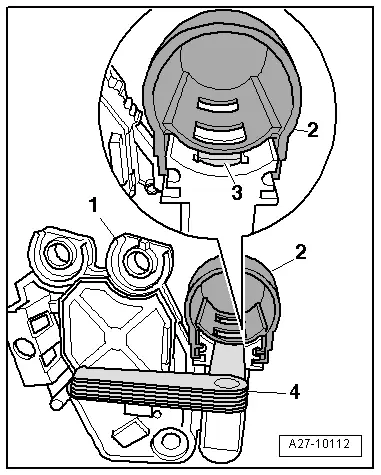
- Push a feeler gauge 0.3 mm -4- between the protective cap -2- and the carbon brushes -3-.
- Pull the protective cap off until the bar of the protective cap presses the carbon brushes down.
- After installation of the voltage regulator, press the protective cap all the way on.
Install in reverse order of removal, observing the following:
- Install the generator. Refer to → Electrical Equipment; Rep. Gr.27; Generator; Generator, Removing and Installing.
Carbon Brushes, Checking, Valeo Generator from 2007
Special tools and workshop equipment required
- Feeler gauge 0.3 mm
Procedure
- Remove voltage regulator. Refer to → Chapter "Voltage Regulator, Removing and Installing, Valeo Generator from 2007".
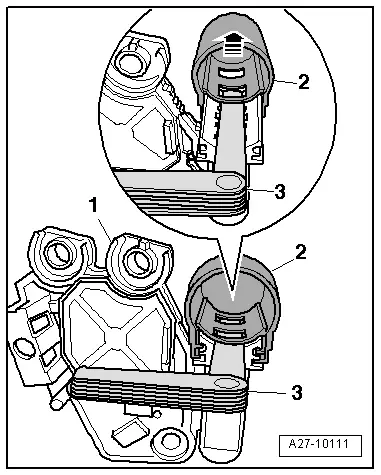
- Push a feeler gauge 0.3 mm -3- between the protective cap -2- and the carbon brushes.
- Remove the protective cap from voltage regulator -1--arrow-.
- Check the length -a- of the carbon brushes.
- Wear limit: -a- = 5 mm.
- With protective cap -2- installed, use feeler gauge -4- to press carbon brushes -3- down.
- Push the protective cap off -arrow- until the bar of the protective cap presses the carbon brushes down.
- Install the voltage regulator. Refer to → Chapter "Voltage Regulator, Removing and Installing, Valeo Generator from 2007".
