Audi Q3: Roof Trim Panels
Component Location Overview - Roof Trim Panel
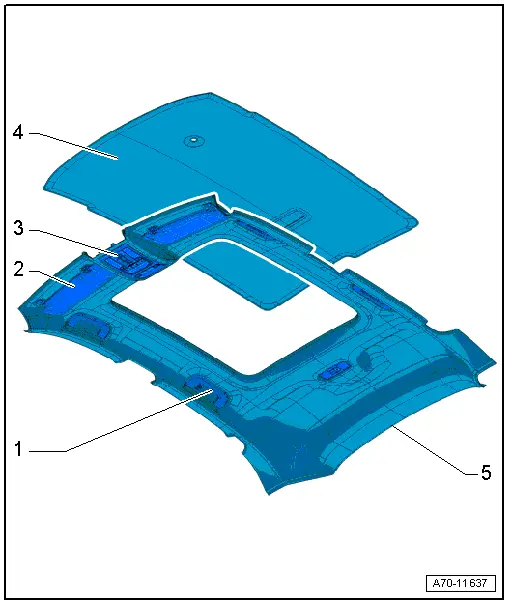
1 - Roof Grab Handle
- Overview. Refer to → Chapter "Overview - Sun Visors".
2 - Sun Visor
- Overview. Refer to → Chapter "Overview - Sun Visors".
3 - Front Interior Lamp/Reading Lamp
- Removing and installing. Refer to → Electrical Equipment; Rep. Gr.96; Controls; Front Interior Lamp/Reading Lamp Removing and Installing.
4 - Roof Reinforcement
- for vehicles without a sunroof
- Overview. Refer to → Chapter "Overview - Headliner".
5 - Headliner
Vehicles with:
- without a sunroof
- with sunroof
- Overview. Refer to → Chapter "Overview - Headliner".
 Caution
- The headliner bends easily.
- Replace the headliner if it is bent.
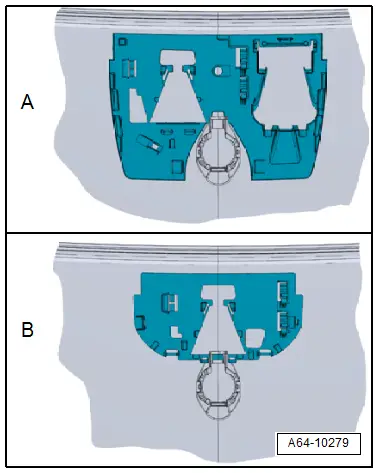
Overview - Headliner

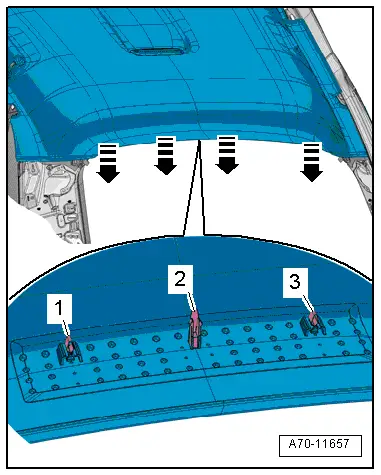
1 - Roof Grab Handle
- Quantity: 4
- Removing and installing. Refer to → Chapter "Roof Grab Handle, Removing and Installing".
- Press the expanding caps until they lock completely.
2 - Headliner
Vehicles with:
- without a sunroof
- with sunroof
There are different versions. When replacing on versions with Driver Assistance Systems Front Camera -R242- determine the version → Fig. "Allocation of the Headliner to the Driver Assistance Systems Front Camera -R242-."; allocation. Refer to the Parts Catalog.
- Removing and installing. Refer to → Chapter "Headliner, Removing and Installing".
 Caution
- The headliner bends easily.
- Replace the headliner if it is bent.
3 - Cover Frame
- only for version equipped with sunroof
4 - Roof Reinforcement
- Only for equipment levels without sunroof
- Attaching to the body. Refer to → Chapter "Roof Reinforcement, Attaching to Body".
5 - Clip
- Quantity: 4
- Insert in the headliner
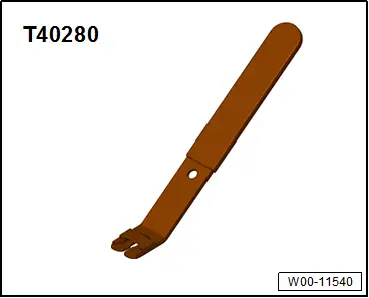
- Remove any remaining clips from the body using Omega Clip Tool -T40280- and use them to install the headliner.
- Replace damaged or deformed clips
6 - Centering Piece
7 - Clip
- For vehicles with sunroof
- Quantity 21
- Insert in the headliner
- Remove the remaining clips in the cover frame and insert in the headliner during installation
- Replace damaged or deformed clips
Allocation of the Headliner to the Driver Assistance Systems Front Camera -R242-.
Before ordering a new headliner on vehicle version with a Driver Assistance Systems Front Camera -R242- the version must be determined.
- Driver Assistance Systems Front Camera -R242- retaining plate version 1 ⇒ headliner version 1 allocation
- Driver Assistance Systems Front Camera -R242- retaining plate version 2 ⇒ headliner version 2 allocation
Headliner, Removing and Installing
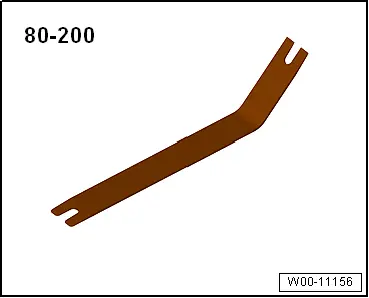
Special tools and workshop equipment required
- Pry Lever -80-200-
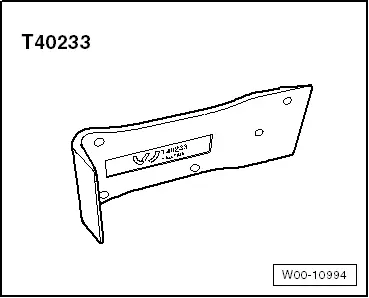
- Removal Wedge -T40233-
- Omega Clip Tool -T40280-
Removing
 WARNING
Follow all safety precautions when working with pyrotechnic components. Refer to → Chapter "Pyrotechnic Components Safety Precautions".
- Remove the front passenger seat. Refer to → Chapter "Front Seat, Removing and Installing".
- Remove the rear bench seat. Refer to → Chapter "Bench Seat/Single Seat, Removing and Installing".
- Remove the rear seat backrest. Refer to → Chapter "Rear Seat Backrest, Removing and Installing".
- Remove the upper A-pillar trim panels. Refer to → Chapter "A-Pillar Trim Panel, Removing and Installing".
- Remove the upper B-pillar trim panels. Refer to → Chapter "Upper B-Pillar Trim, Removing and Installing".
- Remove the C-pillar trim panels. Refer to → Chapter "C-Pillar Trim Panel, Removing and Installing".
- Remove the D-pillar trim panel. Refer to → Chapter "D-Pillar Trim Panel, Removing and Installing".
- Remove the front interior lamp/reading lamp. Refer to → Electrical Equipment; Rep. Gr.96; Controls; Front Interior Lamp/Reading Lamp Removing and Installing.
- Versions with lane assist: remove the interior mirror cover.
- Remove the illuminated vanity mirror. Refer to → Electrical Equipment; Rep. Gr.96; Lamps; Illuminated Vanity Mirror W20/ W14 Removing and Installing.
- Remove the sun visors. Refer to → Chapter "Sun Visor, Removing and Installing".
- Remove the sun visor center support. Refer to → Chapter "Sun Visor Center Support, Removing and Installing".
- Remove the roof grab handle. Refer to → Chapter "Roof Grab Handle, Removing and Installing".
- Position the driver seat in the front, lowest position.
- Position the backrest adjustment wheel until stop downward toward the rear.
Versions Equipped with a Sunroof:
- Open the sunroof -1- all the way.
- Open the sun shade -2- about 2/3.
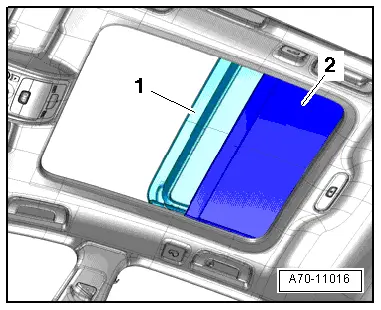
- To prevent dirtying the headliner, clean the Removal Wedge -T40233-.
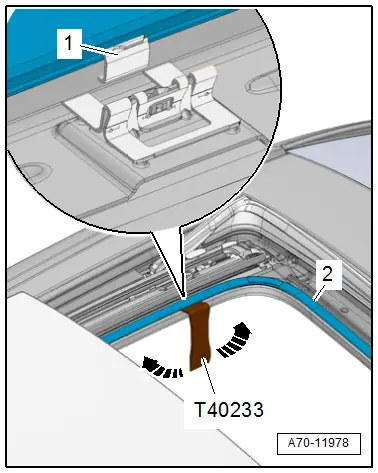
- Push the Removal Wedge -T40233- between the cover frame -2- for the sunroof opening and the headliner.
- Release the cover frames using the Removal Wedge -T40233- one after each other from the brackets -1--arrows-, as shown in the illustration.
Continuation for all vehicles:
 Caution
- The headliner bends easily.
- Replace the headliner if it is bent.
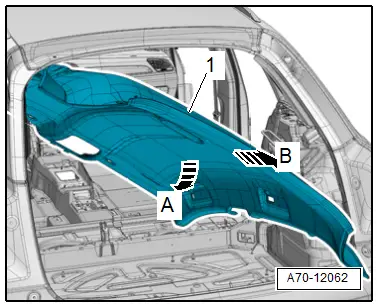
- Unclip the rear headliner using the Pry Lever -80 - 200- at the clips -1- and -3- from the body -arrows-.
- Open the tabs with a screwdriver and unclip the rear section of the headliner from the body at the centering pin -2-.
 Note
Note
Two technicians are needed to loosen the last connections and to remove the headliner.
- Lower the headliner -1- on the right side of the vehicle -arrow A-.
- Carefully remove the headliner through the opening for the rear lid -arrow B-.
Installing
- Align headliner, press in retaining clip at the back of the headliner until it engages audibly in the mounting point of the body.
- Install the center support for the sun visor. Refer to → Chapter "Sun Visor Center Support, Removing and Installing".
- Press the rear clips on the headliner into the mounting points on the body until they audibly engage.
 WARNING
Follow all safety precautions when working with pyrotechnic components. Refer to → Chapter "Pyrotechnic Components Safety Precautions".
Install in reverse order of removal.
Installation notes, for example tightening specifications, replacing components. Refer to → Chapter "Overview - Headliner".
Roof Reinforcement, Attaching to Body
Special tools and workshop equipment required
- Assembly adhesive. Refer to the Parts Catalog.
Procedure
- Remove the headliner. Refer to → Chapter "Headliner, Removing and Installing".
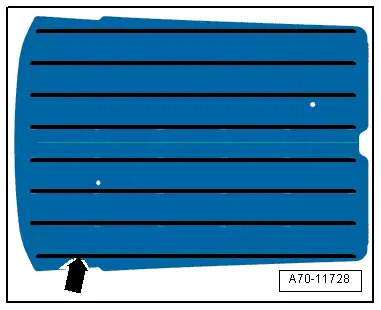
- Apply adhesive beads -arrow- to the roof reinforcement as shown in the illustration.
- Adhesive bead thickness: approximately 8 mm
- Apply the beads of adhesive according to the line markings on the roof reinforcement.
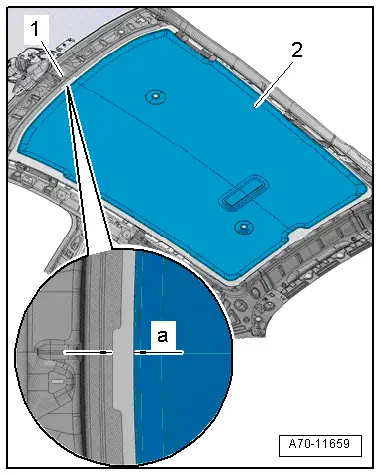
- Mount roof reinforcement -2- centered between the outer sides and at a distance -a- from the roof arch -1- on the roof.
- Dimension -a- = 20 mm.
- Press the roof reinforcement on the roof surface.
- Wipe off any adhesive.
Install in reverse order of removal.
Installation notes, for example tightening specifications, replacing components. Refer to → Chapter "Overview - Headliner".
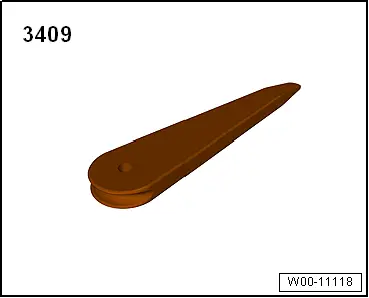
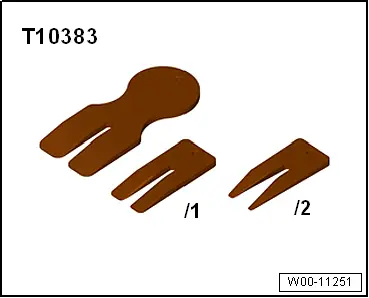
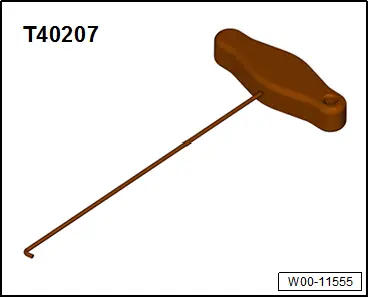
Special Tools
Special tools and workshop equipment required
- Trim Removal Wedge -3409-
- Pry Lever -80-200-
- Wedge Set -T10383-
- Hook Tool -T40207-
- Removal Wedge -T40233-
- Omega Clip Tool -T40280-
READ NEXT:
 Overview - Seat Versions
Component Location Overview - Seat Versions
1 - Front Passenger Seat
Standard Seat/Sport Seat (Manual)
Vehicles with:
Seat/backrest heating
Lumbar Support
Standard seat drawer
Component Location Overview - Electric and Electronic Components
Component Location Overview - Electric and Electronic Components, Manual
Front Seat
1 - Left Front Seat Heating Element -Z45-/Driver Backrest Heating
Element -Z7-
Front passenger SEE MORE:
Traffic incidents
Introduction
Applies to: vehicles with navigation system and online traffic
information
Fig. 135 Traffic information overview
Open traffic information
Requirement: the map must be displayed.
Press on the traffic jam symbol in the side
menu on the map fig. 131.
Display traffic report details
Center Console, Removing and Installing
Center Console, Removing and Installing
Removing
- Remove the center console insert. Refer to
→ Chapter "Center Console Insert, Removing and Installing".
- Versions with Access/Start Authorization Button -E408-:
Remove the front storage compartment. Refer to
→ Chapter 