
Audi Q3: Rear Window Washer System
Overview - Rear Window Washer System
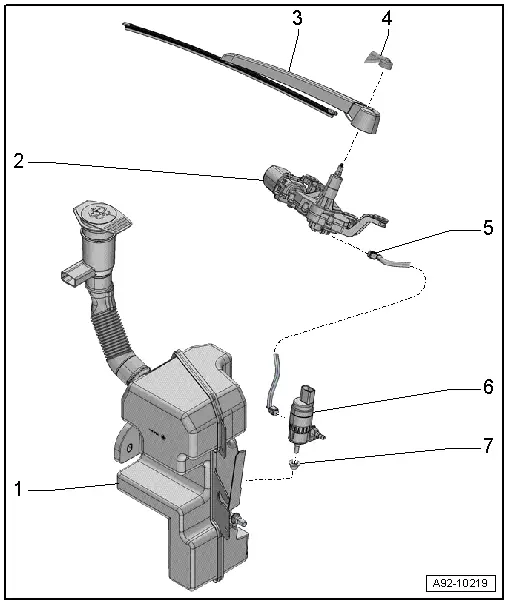
1 - Windshield Washer Fluid Reservoir
- The combined washer fluid reservoir for the front and rear washer systems is located in the left wheel housing.
- Removing and installing. Refer to → Chapter "Washer Fluid Reservoir, Removing and Installing".
2 - Rear Window Wiper Motor -V12-
3 - Wiper Arm
4 - Spray Nozzle
- Removing and installing. Refer to → Chapter "Spray Nozzle, Removing and Installing".
- Adjusting. Refer to → Chapter "Spray Nozzle, Adjusting".
5 - Water Hose
- for the rear window washer system
6 - Windshield Washer Pump -V5-
- The Windshield Washer Pump -V5- for the windshield and the rear window washer system is inside the washer fluid reservoir. Component location: in the left front wheel housing.
- Removing and installing. Refer to → Chapter "Windshield Washer Pump, Removing and Installing".
7 - Grommet
- Replace if damaged.
Spray Nozzle, Removing and Installing
Removing
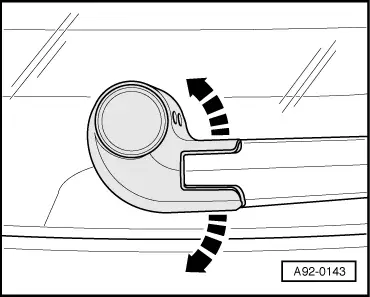
- Carefully expand the cap in direction of -arrows- and remove.
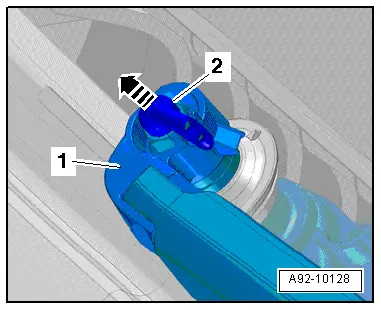
- Carefully remove the spray nozzle -2- from the connecting tube in direction of -arrow-.
Installing
Install in reverse order of removal. Note the following:
- Insert the spray nozzle so the spray opening faces the opening in the wiper arm -1-.
Spray Nozzle, Adjusting
- Adjust the rear window washer system spray nozzles.
- If the spray field does not correspond to the specifications, clean dirty spray jet.
Cleaning the Nozzle:
 Caution
Danger of damage.
Do not use any objects to clean the spray nozzles!
- Remove the spray nozzle. Refer to → Chapter "Spray Nozzle, Removing and Installing".
- Rinse the spray nozzle with clean water opposite the spray direction.
- To remove any remaining impurities, the nozzle must only be blown out opposite to spray direction using compressed air.
- If the spray field still does not correspond to the specifications, replace the spray nozzle.
READ NEXT:
 Headlamp Washer System
Overview - Headlamp Washer System
1 - Washer Fluid Hose
For the right spray nozzle
2 - Bolt
0.9 Nm
Quantity: 2
3 - Right Spray Nozzle
Removing and
Overview - Headlamp
Overview - Headlamp, Headlamp Mount
1 - Ventilation Hose
For the headlamp housing
2 - Lover Mount
For the headlamp housing
Removing and installing. Refer to
→&nSEE MORE:
Wheel Cover, Removing and Installing
Front Wheel Cover, Removing and Installing
Special tools and workshop equipment
required
Hot Air Blower VAG1416 -VAG1416-
Wedge Set -T10383-
Cleaning Solution -D 009 401 04-
Removing
- Remove the front wheel spoiler. Refer to
→ Chapter "Front Wheel Spoiler, Removing and
Overview - Front Brakes
Overview - Front Brakes, 1LJ 1ZD Brakes
1 - Bolt
12 Nm
2 - Brake Rotor
Allocation, refer to the Parts Catalog.
Dimensions, refer to
→ Chapter "Brakes Technical Data"
Wear limit.
Must always be replaced together on both sides of the axle
Do not 