
Audi Q3: Outside Air Temperature Sensor -G17-, Removing and Installing
 Note
Note
Complaints may arise regarding the Air Conditioning (A/C) system regulation if there is a faulty measured value for the Outside Air Temperature Sensor -G17-. Refer to Vehicle Diagnostic Tester in the "Guided Fault Finding" function.
Removing
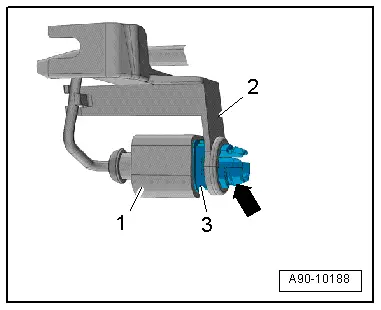
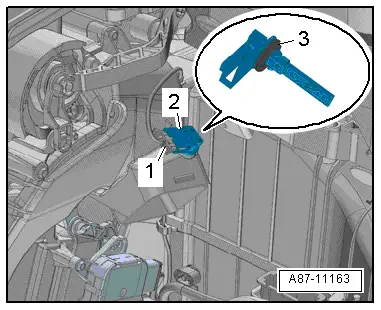
- Reach through the opening in the radiator grille and carefully press the retainers together -arrow-, while removing the Outside Air Temperature Sensor -G17--item 3- from the bracket -2-.
- Disconnect the connector -1-.
Installing
Install in reverse order of removal.
Left Vent Temperature Sensor -G150-, Removing and Installing
 Note
Note
Only on vehicles with an automatic climate control system
Removing
- Remove the driver side instrument panel cover. Refer to → Body Interior; Rep. Gr.68; Storage Compartments and Covers; Driver Side Instrument Panel Cover, Removing and Installing.
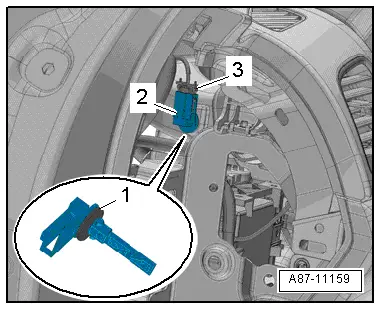
- Turn the vent temperature sensor -2- counterclockwise and remove it from the mount.
- Disconnect the connector -3-.
Installing
Installation is done is reverse order, observe the following:
- Replace the seal -1- if it is damaged or faulty.
- Install the driver side instrument panel cover. Refer to → Body Interior; Rep. Gr.68; Storage Compartments and Covers; Driver Side Instrument Panel Cover, Removing and Installing.
After completing the repair work, perform the following operations on the control head using the Vehicle Diagnostic Tester in the "Guided Fault Finding" function:
- Check the DTC memory and delete any currently displayed entries.
Right Vent Temperature Sensor -G151-, Removing and Installing
 Note
Note
Only on vehicles with an automatic climate control system.
Removing
- Remove the glove compartment. Refer to → Body Interior; Rep. Gr.68; Storage Compartments and Covers; Glove Compartment, Removing and Installing.
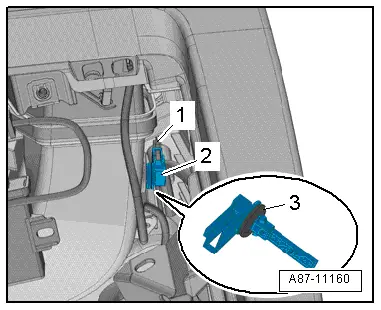
- Disconnect the connector -1-.
- Turn the vent temperature sensor -2- counterclockwise and remove it from the mount.
Installing
Installation is done is reverse order, observe the following:
- Replace the seal -3- if it is damaged or faulty.
- Install the glove compartment. Refer to → Body Interior; Rep. Gr.68; Storage Compartments and Covers; Glove Compartment, Removing and Installing.
After completing the repair work, perform the following operations on the control head using the Vehicle Diagnostic Tester in the "Guided Fault Finding" function:
- Check the DTC memory and delete any currently displayed entries.
Left Footwell Vent Temperature Sensor -G261-, Removing and Installing
 Note
Note
Only on vehicles with an automatic climate control system.
Removing
- Remove the driver side instrument panel cover. Refer to → Body Interior; Rep. Gr.68; Storage Compartments and Covers; Driver Side Instrument Panel Cover, Removing and Installing.
- Remove the driver footwell vent. Refer to → Chapter "Driver Side Footwell Vent, Removing and Installing".
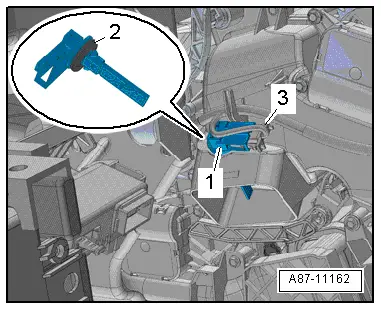
- Turn the vent temperature sensor -1- counterclockwise and remove it from the mount.
- Disconnect the connector -3-.
 Note
Note
If the vent temperature sensor cannot be turned or it is not accessible because of other components, remove the instrument panel. Refer to → Body Interior; Rep. Gr.70; Instrument Panel; Instrument Panel, Removing and Installing.
Installing
Installation is done is reverse order, observe the following:
- Replace the seal -2- if it is damaged or faulty.
- Install footwell vent on the driver side. Refer to → Chapter "Driver Side Footwell Vent, Removing and Installing".
After completing the repair work, perform the following operations on the control head using the Vehicle Diagnostic Tester in the "Guided Fault Finding" function:
- Check the Diagnostic Trouble Code (DTC) memory and delete any currently displayed entries.
Right Footwell Vent Temperature Sensor -G262-, Removing and Installing
 Note
Note
Only on vehicles with an automatic climate control system.
Removing
- Remove the glove compartment. Refer to → Body Interior; Rep. Gr.68; Storage Compartments and Covers; Glove Compartment, Removing and Installing.
- Disconnect the connector -1-.
- Turn the vent temperature sensor -2- counterclockwise and remove it from the mount.
Installing
Installation is done is reverse order, observe the following:
- Replace the seal -3- if it is damaged or faulty.
- Install the glove compartment. Refer to → Body Interior; Rep. Gr.68; Storage Compartments and Covers; Glove Compartment, Removing and Installing.
After completing the repair work, perform the following operations on the control head using the Vehicle Diagnostic Tester in the "Guided Fault Finding" function:
- Check the Diagnostic Trouble Code (DTC) memory and delete any currently displayed entries.
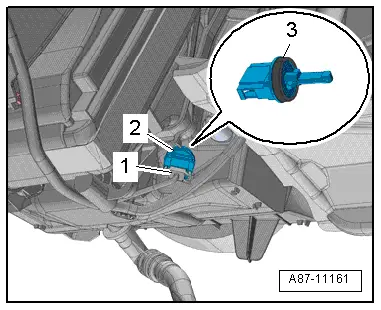
Evaporator Vent Temperature Sensor -G263-, Removing and Installing
Removing
- Remove the right front footwell center console trim panel. Refer to → Body Interior; Rep. Gr.68; Center Console; Front Footwell Center Console Trim Panel, Removing and Installing.
- Disconnect the connector -1-.
- Turn the vent temperature sensor -2- counterclockwise and remove it from the mount.
Installing
Installation is done is reverse order, observe the following:
- Replace the seal -3- if it is damaged or faulty.
- Install the front footwell center console trim panel. Refer to → Body Interior; Rep. Gr.68; Center Console; Front Footwell Center Console Trim Panel, Removing and Installing.
After completing the repair work, perform the following operations on the control head using the Vehicle Diagnostic Tester in the "Guided Fault Finding" function:
- Check the Diagnostic Trouble Code (DTC) memory and delete any currently displayed entries.
READ NEXT:
 Humidity Sensor -G355-, Removing and Installing
Humidity Sensor -G355-, Removing and Installing, Vehicles without
Driver Assistance Systems Front Camera
Note
Only on vehicles with an automatic climate control system
There are diff
Warnings when Working on Vehicles with High Voltage System
Working on Vehicles with High-Voltage System (Hybrid Vehicles)
Extremely Dangerous Due to High-Voltage
The high-voltage system is under high-voltage. Death or serious
bodily injury by electric shoSEE MORE:
Folding the outer backrests
Applies to: vehicles with folding backrests
Fig.72 Rear bench seat: loop
The rear seat backrests can be folded forward either
separately or together.
Observe the safety precautions.
If necessary, slide the rear bench seat back.
To fold the backrest forward, pull the strap 1
in the direction of
Overview - Window Regulator
1 - Door
2 - Clip
For the window regulator cable
3 - Lower Double-Bolt
4 - Window Regulator
Removing and installing. Refer to
→ Chapter "Window Regulator, Removing and Installing".
5 - Lower Double-Bolt
6 - Door 