Audi Q3: CV Joint, Servicing, Drive Axle with CV Joint VL107
Special tools and workshop equipment required
- Clamping Pliers -VAG1682A-
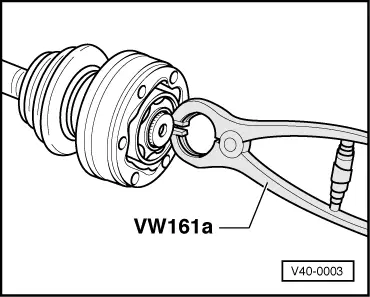
- Circlip Pliers -VW161A-
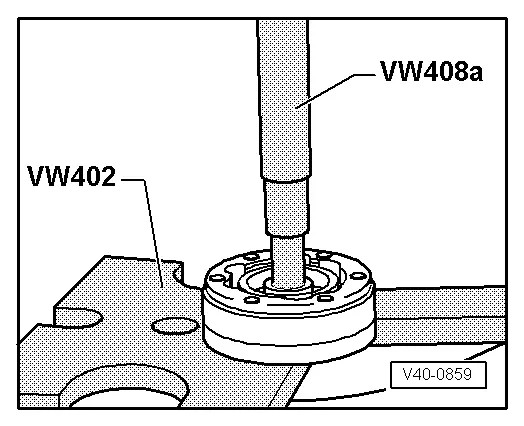
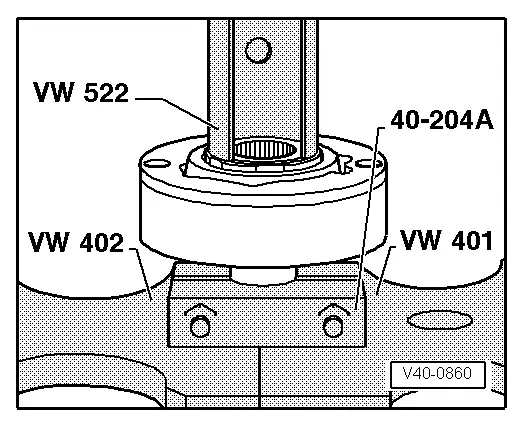
- Press Plate -VW401-
- Press Plate -VW402-
- Press Piece - Rod -VW408A-
- CV Joint Press Sleeve -VW522-
- Press Block -40-204A-
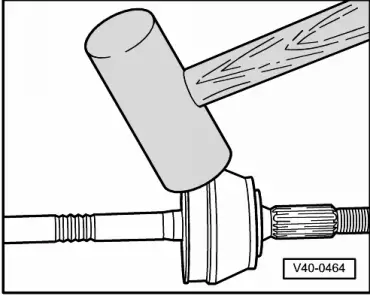
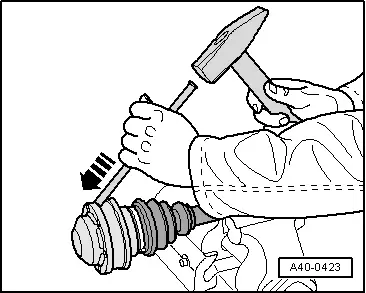
Removing the Outer CV Joint
- Remove the CV joint from the drive axle by hitting it with a light alloy hammer.
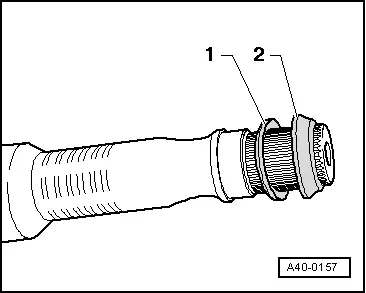
If installed, installation position of spacer ring and plate spring on outer joint.
1 - Plate Spring
2 - Spacer ring (plastic)
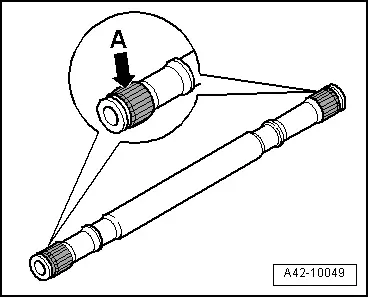
Outer CV Joint with Bolt, Installing
- Before installing joint piece, splines -A- must be lightly coated with grease used in joint.
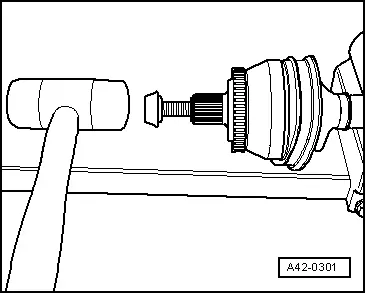
- Install the old bolt in the joint as shown in the illustration.
- Drive joint onto shaft with plastic hammer until circlip engages.
Removing the Inner CV Joint
Removing the Cover
- Drive cover down with copper or brass drift.
Circlip, Removing and Installing
- Drive out CV joint boot with a drift.
- Support ball hub when pressing off.
Pressing on inner CV joint
- Before installing joint piece, splines -A- must be lightly coated with grease used in joint.

- Press on joint until stop.
- Install circlip.
 Note
Note
Chamfer on inner diameter of ball hub (splines) must face the contact shoulder on the drive axle.
Coat the sealing surface on the cover with sealant and then install it.
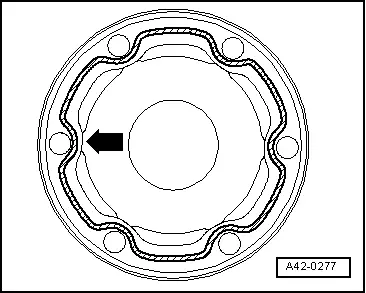
- Apply sealant - shown as the cross-hatched area- onto the clean cover surface.
- Sealant bead: apply a continuous bead with a 2 to 3 mm diameter in cross-hatched area and inside the holes -arrow- as shown.
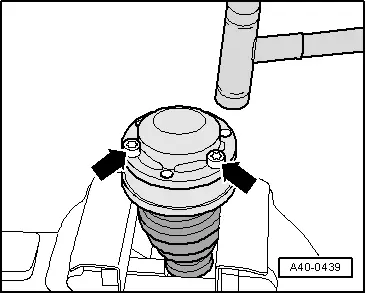
- Align new cover with bolts -arrows- to bolt holes.
It must be aligned exactly because it cannot be aligned after driving on.
- Drive cover on with a plastic hammer.
- Wipe away any sealant leaking out.
Rubber CV Boot, Venting
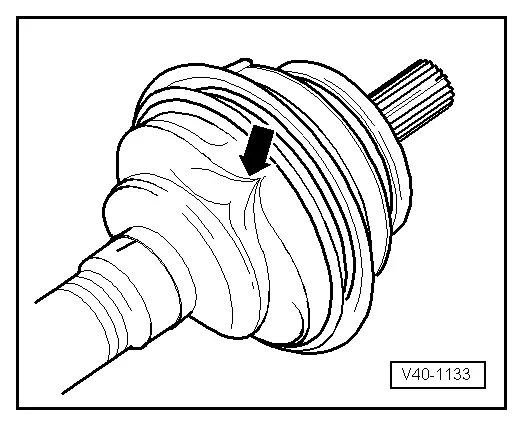
The CV boot is frequently pressed in when placed on the CV joint body. This creates a vacuum in the CV boot, which pulls a fold inward when the car is driven -arrow-.
Therefore, note the following:
- Before clamping the clamping sleeves, balance the pressure by raising the CV boot.
Stainless Steel Clamps for Hytrel Protective Joint Boots, Tensioning
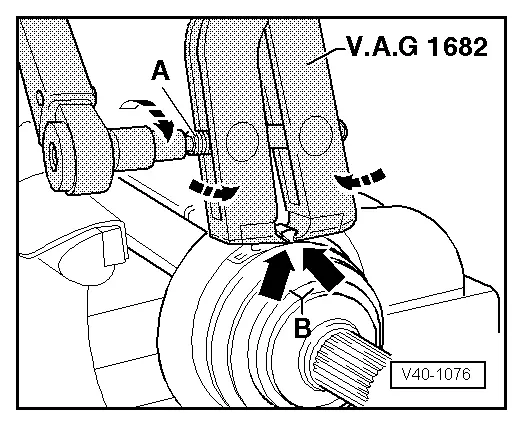
- Position the Clamping Pliers -VAG1682A- as shown in illustration. When doing this, make sure that edges of Clamping Pliers -VAG1682A- are seated in the corners -arrows B- of clamp.
- Tighten the Clamping Pliers -VAG1682A- by turning spindle -A- using a torque wrench (do not tilt the Clamping Pliers -VAG1682A-).
- Tightening specification: 20 Nm
 Note
Note
- Make sure the threads on the spindle on the pliers move easily. Lubricate with MoS2 grease, if necessary.
- If the thread is tight, for example it is dirty, the required tensioning force for the hose clamp will not be achieved in spite of correct torque specification settings.
READ NEXT:
 CV Joint, Servicing, Drive Axle with Triple Roller Joint AAR3300i, Mounted
in Transmission
CV Joint, Servicing, Drive Axle with Triple Roller Joint AAR3300i, Mounted
in Transmission
Special tools and workshop equipment
required
Tripod Joint Tool -T10065-
Puller - Driveshaft -T10382-
Hose Clip Pliers -VAG1275A-
Torque Wrench 1331 5-50Nm -VAG1331-
Torque Wrench 1332 4
CV Joint, Servicing, Drive Axle with Triple Roller Joint AAR3300i, Mounted
on Transmission Stub Shaft
Special tools and workshop equipment
required
Tripod Joint Tool -T10065-
Puller - Driveshaft -T10382-
Hose Clip Pliers -VAG1275A-
Torque Wrench 1331 5-50Nm -VAG1331-
Torque Wrench 1332 4
CV Joint, Servicing, Drive Axle with CV Joint, Inserted with Inner Splines
Special tools and workshop equipment
required
Seal Installer - Bevel Box -T10243-
Torque Wrench 1331 5-50Nm -VAG1331-
Clamping Pliers -VAG1682A-
Press Piece - Multiple Use -VW447H-
CoppeSEE MORE:
Air Intake and Outlet Openings
Air Intake and Outlet Openings, Air Intake Housing
1 - Air Guide Housing
2 - Fresh Air Door
There are different versions. Refer to the Parts Catalog.
Only automatic climate control system
3 - Air Recirculation Door/Recirculation-/Fresh Air Door
There ar
Refrigerant Circuit, Flushing with Compressed Air and Nitrogen
General Information
Vehicles with a High Voltage System (Hybrid Vehicles)
Extremely Dangerous Due to High-Voltage
The high-voltage system is under high-voltage. Death or serious
bodily injury by electric shock.
- Individuals with electronic/medical life- and health sustaining
machines i