Audi Q3: Trailer Hitch
Overview - Trailer Hitch
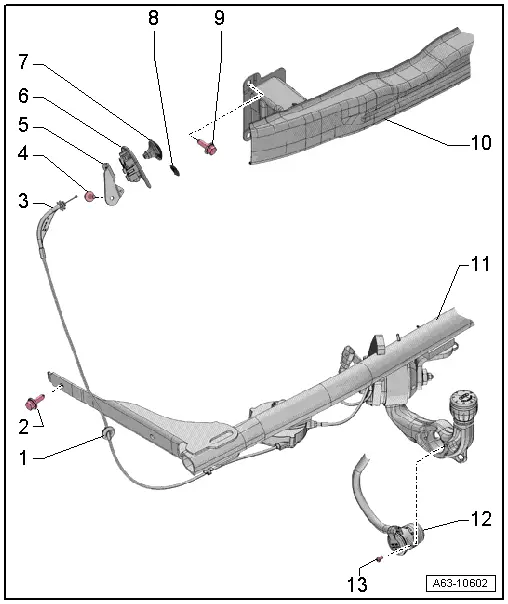
1 - Grommet
- For the cable
2 - Bolt
- Quantity: 4
- Tightening specification. Refer to → Chapter "Overview - Impact Member".
3 - Cable
- For unlocking the trailer hitch
4 - Bolt
- 2 Nm
5 - Bracket
- For cable mount
- Removing and installing. Refer to → Chapter "Cable Mount Bracket, Removing and Installing".
6 - Mount
- For the cable
- Removing and installing. Refer to → Chapter "Cable Mount, Removing and Installing".
7 - Pull Knob
- For unlocking the trailer hitch
- Removing and installing. Refer to → Chapter "Cable Mount, Removing and Installing".
8 - Lock Clamp
- For the pull knob
9 - Bolt
- Left: 2 washers, right: 4 washers
- Tightening specification. Refer to → Chapter "Overview - Impact Member".
10 - Impact Member
- For vehicles without a trailer hitch
- Overview. Refer to → Chapter "Overview - Impact Member".
11 - Impact Member
- For vehicles with a trailer hitch
- Overview. Refer to → Chapter "Overview - Impact Member".
12 - Socket
- Removing and installing. Refer to → Electrical Equipment General Information; Rep. Gr.96; Trailer Hitch.
- Connector assignment. Refer to → Electrical Equipment General Information; Rep. Gr.96; Trailer Hitch.
13 - Bolt
- 3.5 Nm
- Quantity: 3
Cable Mount, Removing and Installing
 WARNING
Danger of causing injury to the legs.
Keep a safe distance from the swivel range of the ball head when unlocking the trailer hitch.
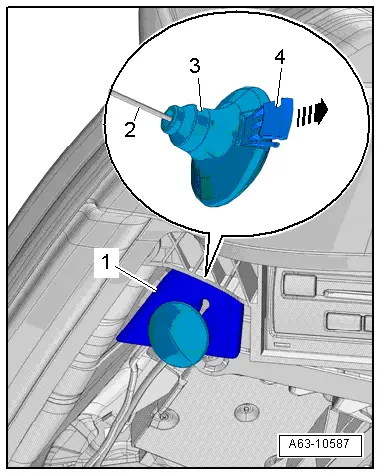
Removing
- Remove the cover from the luggage compartment left trim panel. Refer to → Body Interior; Rep. Gr.70; Luggage Compartment Trim Panel; Overview - Luggage Compartment Side Trim Panel.
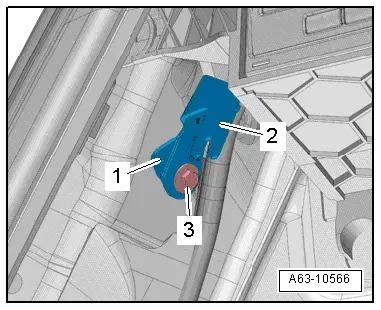
- Remove the pull knob -3- on the mount -1- and pry off the clamp -4- with a narrow screwdriver -arrow-.
- Remove the cable -2- from the pull knob.
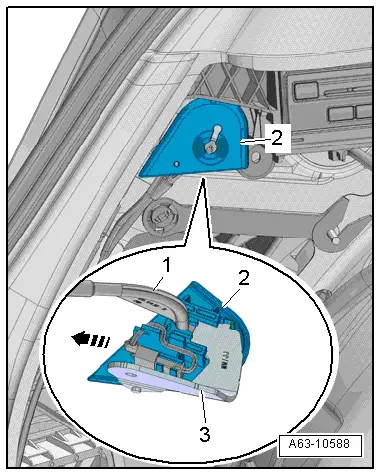
- Remove the cable mount -2- with the cable bracket -1- downward from the bracket -3--arrow-.

- Disconnect the connector.
- Remove the cable bracket -1- from the mount -2--arrow-.
Installing
Install in reverse order of removal. Note the following:
- Install the luggage compartment side trim panel. Refer to → Body Interior; Rep. Gr.70; Luggage Compartment Trim Panel; Overview - Luggage Compartment Side Trim Panel.
Cable Mount Bracket, Removing and Installing
Removing
- Remove the cable mount -2- with the cable bracket -1- downward from the bracket -3--arrow-.
- Remove the bolt -3- and then remove the bracket -2-.
Installing
Install in reverse order of removal. Note the following:
- The lobes -1- on the bracket must engage in the opening on the body.
- Install the cable mount. Refer to → Chapter "Cable Mount, Removing and Installing".
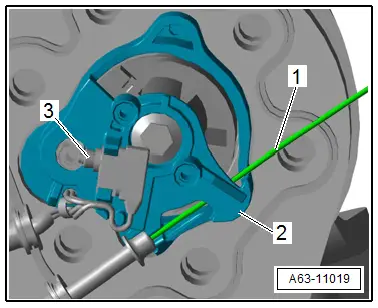
Trailer Hitch, Removing and Installing
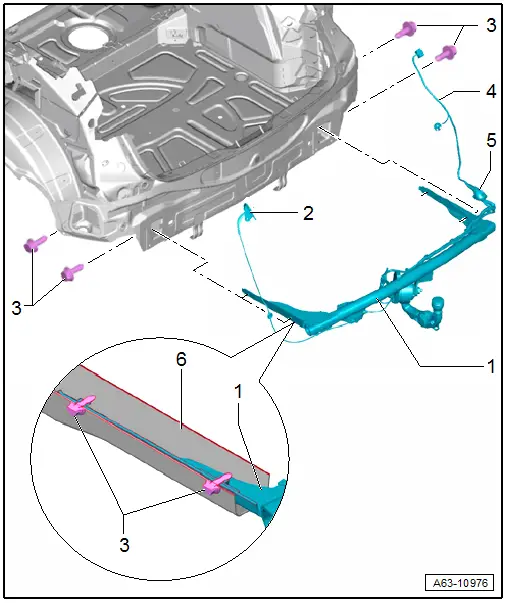
1 - Trailer Hitch
- Removing
- Remove the rear bumper cover. Refer to → Chapter "Bumper Cover, Removing and Installing".
- Pull the control module in the right side panel out of the frame and disconnect the connector.
- Open the cable holder, free up the wiring harness and push outward through the grommet -4-.
- Disengage the cable from the bracket, (Refer to → Chapter "Cable Mount, Removing and Installing".) and remove from the vehicle.
- Remove bolts -3-.
- Remove the impact member -3- with a second technician.
2 - Cable
- Remove the cable from the mount. Refer to → Chapter "Cable Mount, Removing and Installing".
3 - Bolt
- 75 Nm
4 - Wire
5 - Grommet
- Ensure correct seating when installing.
6 - Longitudinal Member
Cable and Trailer Hitch Microswitch, Replacing
 Note
Note
The cable or the microswitch can be replaced individually.
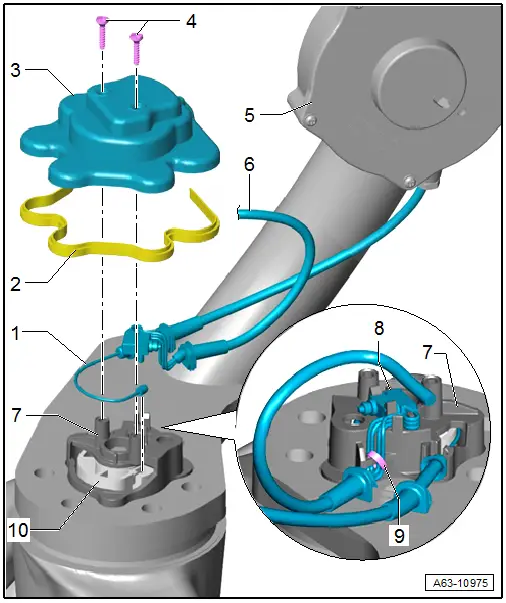
1 - Cable
- Removing
- Remove the trailer hitch.
- Remove the bolts -4- and remove the cover -3- with the seal -2-.
- Guide the cable out the sheave -10- and pull from the bracket.
- Remove the cable transmission.
- Installing
- Install in reverse order of removal.
2 - Seal
- No replacement part, in pushed in the cover
3 - Cover
- Before installing the cable passages must be greased.
4 - Bolt
- 1.5 Nm
5 - Cable Transmission
- Removing and installing.
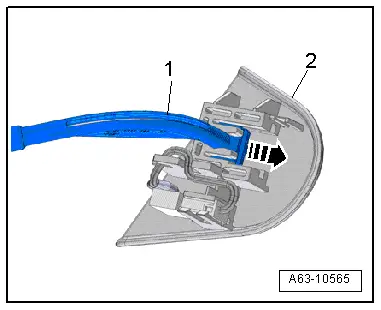
6 - Wire and microswitch
- Remove the wire from the connector.
- When installing the wires must be routed down as shown.
7 - Bracket
8 - Microswitch
- Removing and Installing.
- Remove the trailer hitch.
 Caution
- When the microswitch is removed the retaining clips can only be carefully bent, there is a risk of damage.
- If the retaining clips are broken the trailer hitch must be replaced.
- Open cable tie -9- and unclip the microswitch -8-
- Pushed in the bracket as shown.
- When installing pay attention that the wires are counted correctly.
9 - Cable Tie
- After installing secure the wire with a cable tie at the same location.
10 - Sheave
Disengage the Sheave from the Cable
- Disengage the cable -2- with the nipple -arrow- from the sheave -1-.
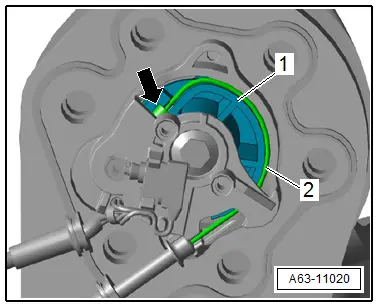
- Remove the cable -1- through the bracket -2-.
Grease the Cover
- The cable passages -arrows- on the cover must be heavily lubricated with Silicone Grease - G 000 405 A2-.
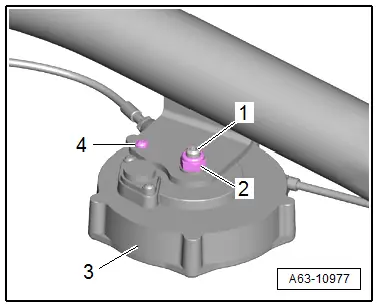
Cable Transmission, Removing and Installing
Removing
- Counterhold with a hex socket wrench on the threaded pin -1-, to remove the nut -2-.
- Remove the screw -4-.
Installing
- Install the transmission -3- and install the nut -2- hand tight.
- Tighten the screw -4- to 1.5 Nm.
- Counterhold using a hex socket wrench on the threaded pin -1- and tighten the nut -2- to 10 Nm.
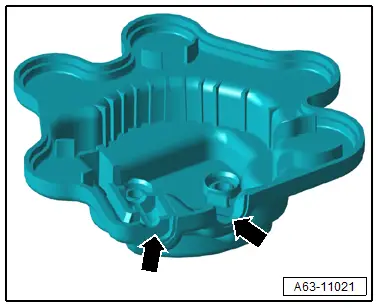
Removing and Installing Microswitch
- Cover removed.
- Remove the wire from the connector.
 Caution
- When the microswitch is removed the retaining clips -arrows- can only be carefully bent, there is a risk of damage.
- If the retaining clips are broken the trailer hitch must be replaced.
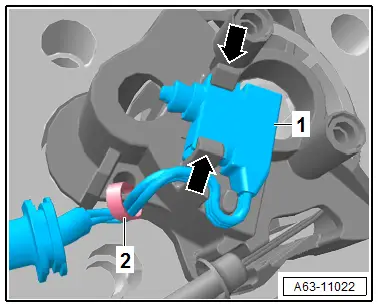
- Remove the cable tie -2- to remove.
- Carefully bend the retaining tabs -arrows- and unclip the microswitch -1- from the mount and remove upward.
- When installing route the wire as shown and secure with a cable tie.
- Push the microswitch in the clamp.
Special Tools
Special tools and workshop equipment required
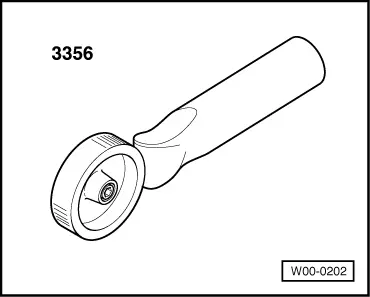
- Roller -3356-
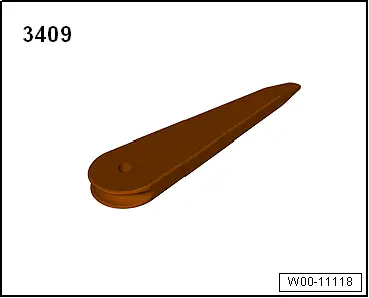
- Trim Removal Wedge -3409-
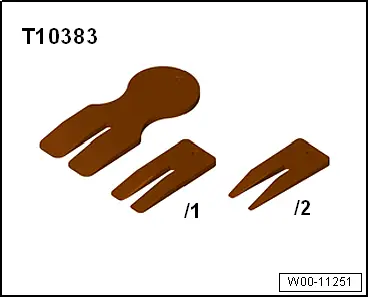
- Wedge Set -T10383-
- Double Suction Lifter -VAG1344-

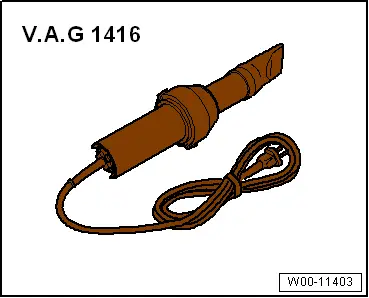
- Hot Air Blower VAG1416 -VAG1416-
Revision History
DRUCK NUMBER: A005A001221

READ NEXT:
 Safety Precautions
Start/Stop System Safety Precautions
Pay attention to the following when working on a vehicle
with Stop/Start system:
WARNING
There is a risk of injury if the engine starts
automaticaSEE MORE:
Exterior lighting
Switching the lights on and off
Fig. 37 Instrument panel: light button module
Light switch
Press and hold 1 until the desired light function
is selected. The selected function is displayed
briefly in the instrument cluster. When switching
on the ignition, the AUTO light function is automaticall
Component Location Overview - Instrument Panel Controls
1 - ASR/ESP Button -E256-
Removing and installing. Refer to
→ Chapter "ASR/ESP Button -E256-, Removing and Installing".
2 - Left Lower Button Unit
Equipment level
With Driving Profile Selection Switch Module -E592-, Start/Stop Mode
Button -E693-, Paralle